
If you’re one of the usual readers around these parts, here’s something a little bit different! Partly for posterity and partly as a reference so that I have it for some convention panels and workshops that I’ll be doing in the future, here’s a primer on my miniature painting method and, specifically, how I recently tackled some angry, angry lads. Here I’ll try and show on a beginner level how to go from gray plastic to a completed, finished model.
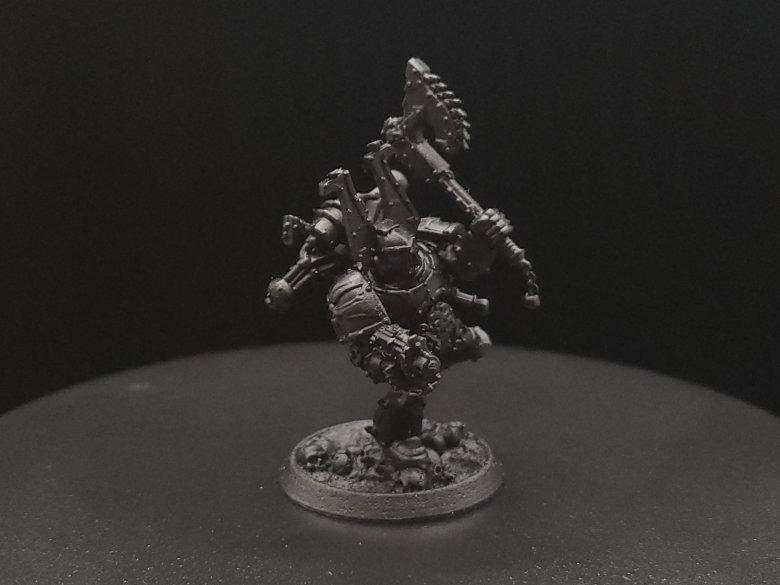
So, continued from last time: Before Painting!
When our model is assembled, we’ll attach the model and then glue some basing sand and rocks and other bits over the bases themselves. Try not to get any on the rims, but if you do, it can always be removed with tweezers or sanded off later. When this is done, you can prime your model. For these, I suggest starting with just a flat black primer because were going to build up the red color on most of the model from there.
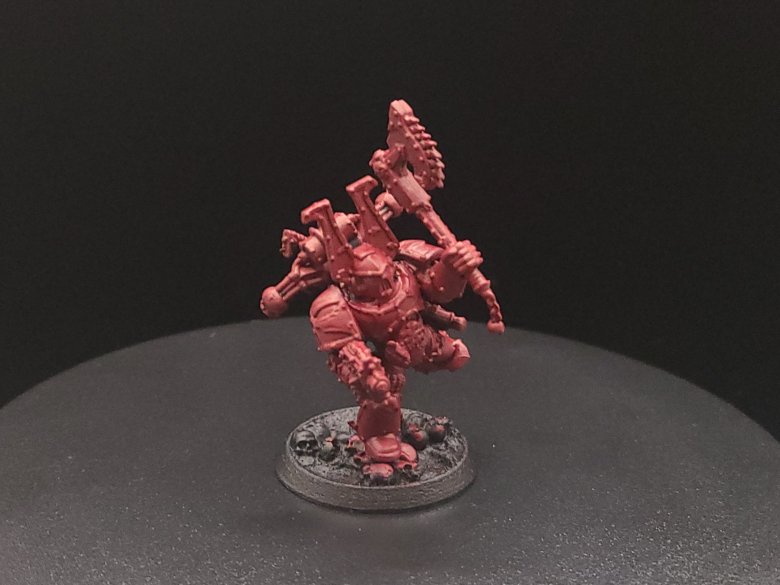
Red (Base Coat) : First, we start by base coating our model. Thinning your paint down a little, and using a medium-sized brush, apply the darkest out of the three red paints that youre working with. Remember that its always better to apply a couple of thin coats than a thick coat, to keep the recessed areas clear and to keep from obscuring detail on your model.
Red (Drybrush – optional) : The next thing we do is a technique called drybrushing. Here, we take a larger brush and were going to add some of our medium red to it, without watering that red down at all. Before applying anything to the model, brush the excess paint off onto a paper towel or your parchment paper until you notice that no more of the wet paint is coming off, or that a lighter amount of pigment is being applied. Next you can take your drybrush and apply back and forth brushing strokes over broad parts of the models surface, and what this will do is keep the recesses dark and clear but make it appear that the light is reaching areas that stand out or stick out more.
This can also be a very good way when we do highlighting to mark out or distinguish what raised details are going to need highlights. If you don’t want to drybrush but want to build up a good color blend you can also just apply your medium red color with a fine detailed brush over the places on your model that should be raised up from the recesses or where you want the light to be hitting.

Red (Wash) : Here, you’ll want to brush off a little excess after you dip your brush in the Carroburg Crimson because you want to avoid flooding the model you’re working with excessively, but you don’t need to be too careful otherwise while initially applying your wash. This will sink into the recessed details and darken them from the color of your base coat and add more depth to the model. Keep an eye on your model and if you see excess wash paint collecting in little pools or blobs you can either push or pull it around with your brush to areas with less coverage while wet or use a paper or sponge to try and soak up that excess. If you drybrushed before, you can apply a light drybrush coat again after this stage or you can apply a little of your medium red in places where you think the wash might have darkened things up just a little too much.

Red (Edge Highlights) : Now that the wash is done, we’re going to apply highlights, which is the most time-consuming part of the process. Here, you pick out what you think are the most extreme raised details or the places on the model that you think should be brightest from your light source, and you’re going to apply this carefully with a fine detail brush. A few tips on highlights include making sure that you have your elbows firmly planted on the table and feet on the ground to be precise, and try to also work under a good light source if at all possible.

It’s That Easy! : Now that you’re done your red, that covers a lot of the basics of miniature painting – your base coat, medium tone, wash or ink, and then highlights are the same steps that you’re going to take with each of the different color combinations you’ll apply to your miniature, with a dark, medium and light tone, and a wash filling in recessed details, but there’s also exceptions to every rule and the most important thing is to experiment.
Brown (Base Coat) : A good rule of thumb is to paint colors on your model in order of what covers the most surface area. There’s lots of exceptions to this, but right now we’re going to paint our brown with two thin coats of either Skrag Brown or with Vallejo Flat Earth on the base to represent the ground our little dude is walking on. At the same time, we’ll use a darker brown, like Rhinox Hide, to cover over any of the places on the model that we want to represent leather holsters, sheaths, or straps. You can also add lighter brown edge highlights to the leather parts to add a little more depth.

Brown (Wash and Drybrush) : Once we have our base coat applied, we’re going to apply a wash of Agrax Earthshade to get down into the recesses and give our basing and skulls a little more definition, as well as up on the leathery parts. On the leather parts, if you did edge highlights you’ll notice that the wash also acts as a sort of glaze helping to tie your two leather colors together. Once the wash is dried, apply a light drybrush of Flat Earth or Skrag Brown to your base to add more contrast – this will help a lot with the next step.
Bone (Drybrush) : Instead of adding a base coat, we’re actually going to skip ahead and apply our Bone color, either Ushabti Bone or Vallejo’s Buff. We’re going to apply this by drybrush only to the basing, and it will work as a highlight on the ground but will also naturally mark out any parts of the skulls that are going to be highlighted or raised, or that you want to stand apart.

Bone (Base and Wash) : Next, we’re going to apply two thin coats of Ushabti Bone or Buff as a base coat to all of the unpainted skulls on our Berzerker, but we’re also going to use this to paint any of the skull pieces on the base that we want to be visible. After these coats are dry, use a lightened wash of Agrax Earthshade to give these bone pieces a little more definition. You can do this by adding a little Matte Medium, Contrast Medium, or even water to your shade.
Bone (Highlight) : With a small brush, apply Buff or Ushabti Bone again to the most raised parts of the skulls. You can then use a little Screaming Skull, or any other lighter bone tone, to either apply directly as an edge highlight or you can blend it with some of the color you used before to make the color gradient a little more clear.
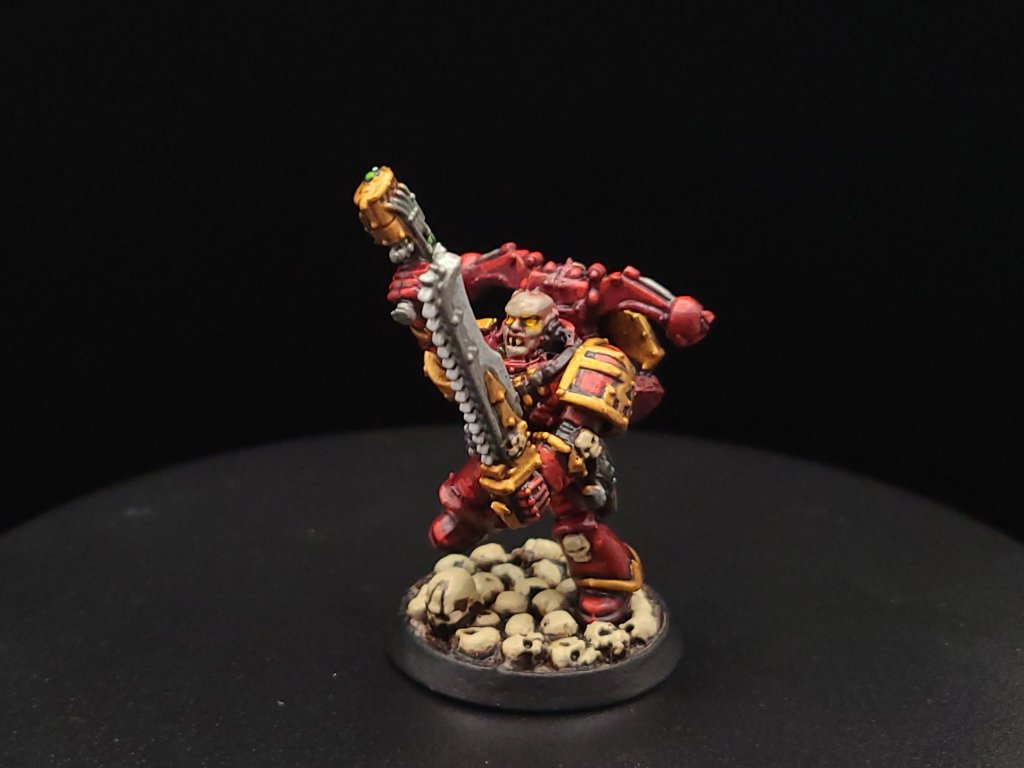
Flesh (Base) : Not all little dudes have their helmets on, and so here’s a quick way that you can paint fleshy parts on your Chaos models easily. You can start with a reddish flesh tone like Bugman’s Glow, in two thin coats. After this, before doing your wash, apply highlights of Rakarth Flesh – these will stand out a lot from the Bugman’s Glow and will look odd at this stage.
Flesh (Wash) : Once the base and highlight colors are done, you can apply Reikland Fleshshade to your model – this useful red wash will tie the two previous colors together and make the blend look a lot more natural.


Black (Base) : Next, we’ll want to use either Abaddon Black or Vallejo Black to mark off any tubes on our marines, but also the bolters – this is very important for the next couple steps. When the black is dried on the tubes, we’re going to use a dark gray like either Mechanicus Standard Grey or Vallejo’s Gray Green to highlight the raised parts of any of these tubes, just to show where the light is hitting them.

Bolter Effects: Sponges, like the ones you have in your kitchen, or like the sponge brushes you can find at craft and dollar stores, are a great resource to use for applying some texture and grunge to your models. They’re also quick and pretty easy to get the hang of. Here, we’re going to take a dark silver color like Leadbelcher, and use a small piece of sponge to carefully apply that to the black-colored bolt pistol to give it a nice gunmetal look. You can use the same kind of sponge to apply some Trollslayer Orange or Vallejo Orange Red to the underside and body of the bolter to make it look rusty and worn.
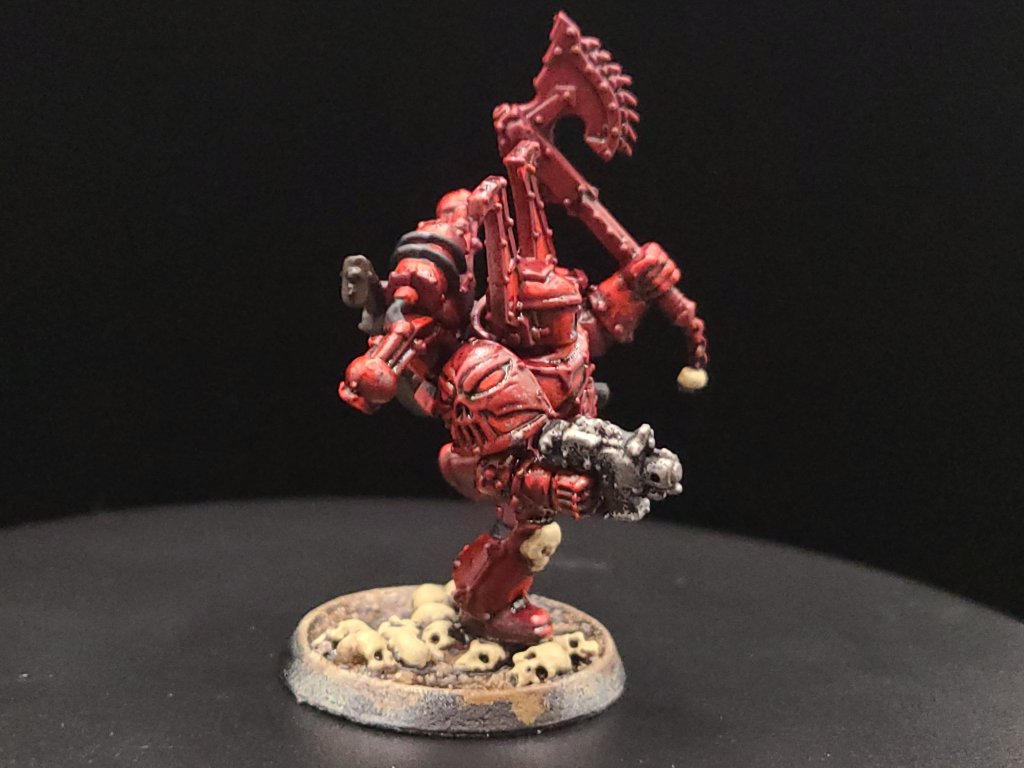

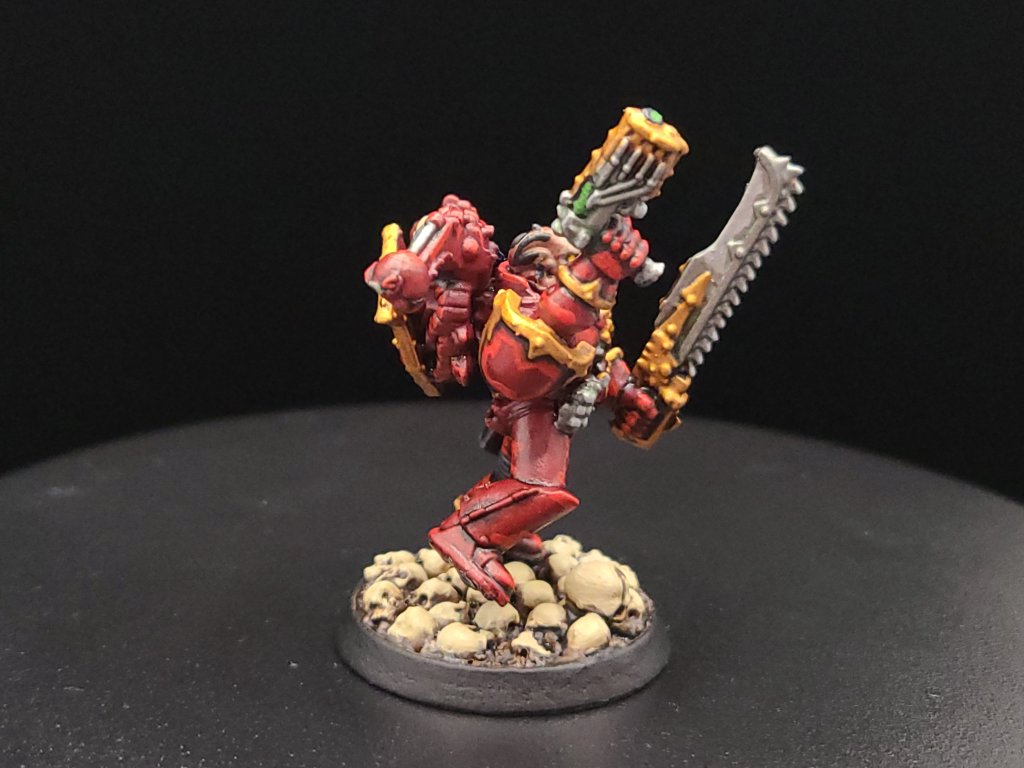
Silver Metallics (Base) : Now we’re going to go ahead and apply Leadbelcher in two thin coats as a base coat to the chainsword or axe along with any of the chains or other metal greeblies on the model. When this is done, we’re going to put edge highlights on these, but also on the bolter pistol that we just finished – this will make it look like the rust has been shaved down in some of the places we’ve stuck it with the previous step and helps to cap off our bolter effects.
Silver Metallics (Wash) : Now we’re going to apply a wash to our Bolter, weapons, and chains. If you’re starting out you can’t go wrong with either Agrax Earthshade or Nuln Oil, but if you have a few extra shades lying around, greens like Coelia Greenshade or Biel-Tan Green are a great way to give your silver metallics contrast with the rest of your model’s colors.

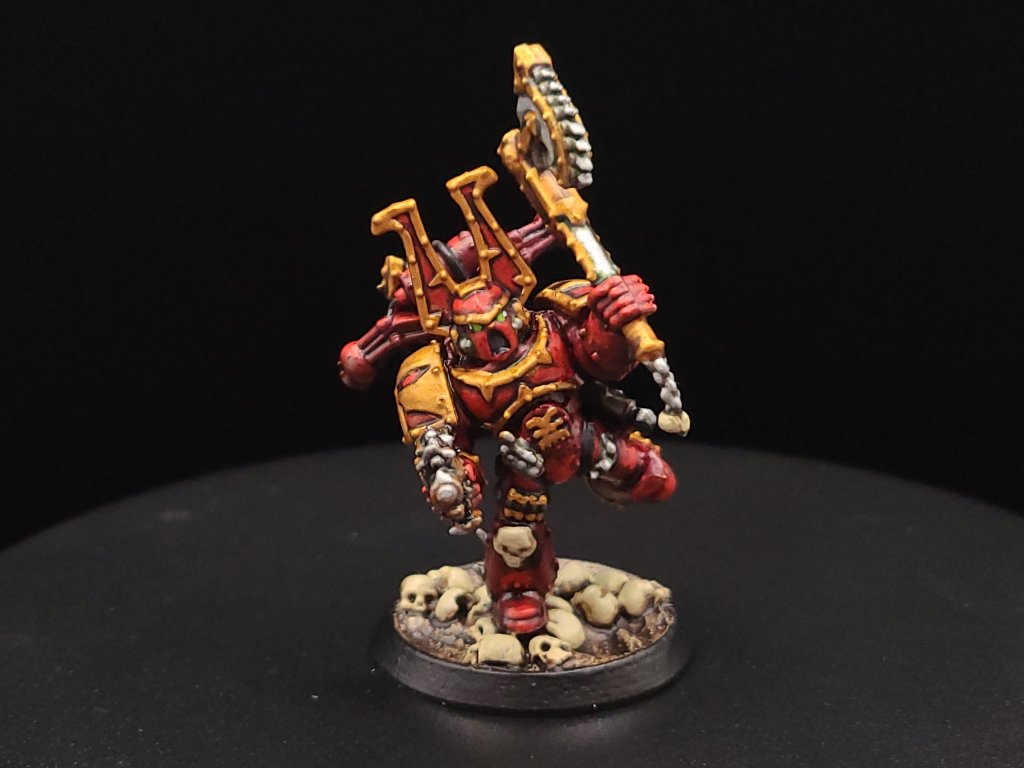
Gold Metallics (Base) : Now comes the most time-consuming, tricky part of the process. Using a small brush, you’ll want to apply a couple thin coats of Retributor Gold to your model anywhere that it looks like there’s trim around the red main ‘body’ of the armour. You’ll see a lot of this on the shoulders, weapon, and helmet. Take your time and try to keep your elbows and feet planted and stable. The first pass marking out the gold will be the hardest, and after that you’re just adding more density to the gold colors.

Gold Metallics (Wash and Highlight) : We’re going to add a wash of Agrax Earthshade to our basecoat, and we’re going to do a highlight after this in Retributor Gold – I’ve had a hard time finding a more effective gold for these than Retributor Gold.

Lenses and Plasma (Base) : With everything else on our model finished, we’re going to add some green to the eye-lenses of our model’s helmet and to any plasma weapons they’re carrying. For this, we’re going to start with either Caliban Green or we can start with something like Vallejo’s Olive Green. After this, add just a smaller dab of Warpstone Glow or Uniform Green to the inside of the lenses, closer to the nose, or to the center of your plasma weapon.

Lenses and Plasma (Highlight) : To finish our lenses and plasma weapons, add a little dot of Moot Green or Lime Green to the inside of the lenses, again near the nose, a little smaller than the last dab we added. Also add this to the center of any rings on your plasma weapons. Last, finish off with a dot of white, but this time on the opposite side of the lenses, or the side facing farthest away from the nose. For the plasma, however, we’re going to place this very thin line just over the Lime Green on any of our other plasma ‘rings.’

Other Eyes (Base, Wash, Highlight) : For those models that don’t have helmets, we can do green eyes or for a neat effect we can go with a fiery yellow color. Here, we base coat the eyes with Averland Sunset, and then apply a dot of Yriel Yellow. You can use a light wash of Agrax Earthshade or Cassandora Yellow to really help this effect along.

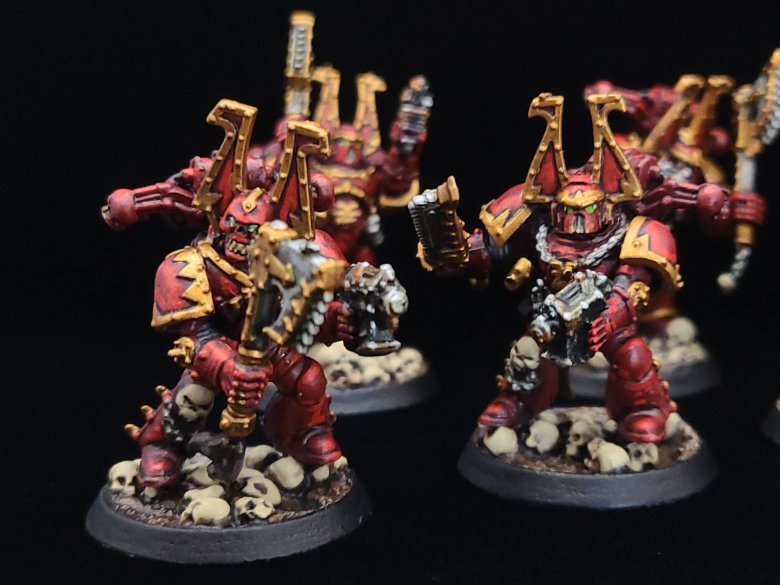
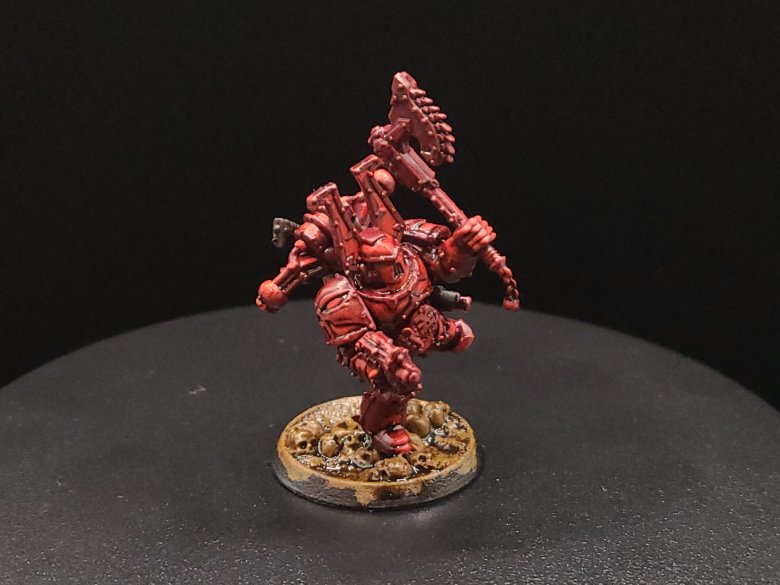
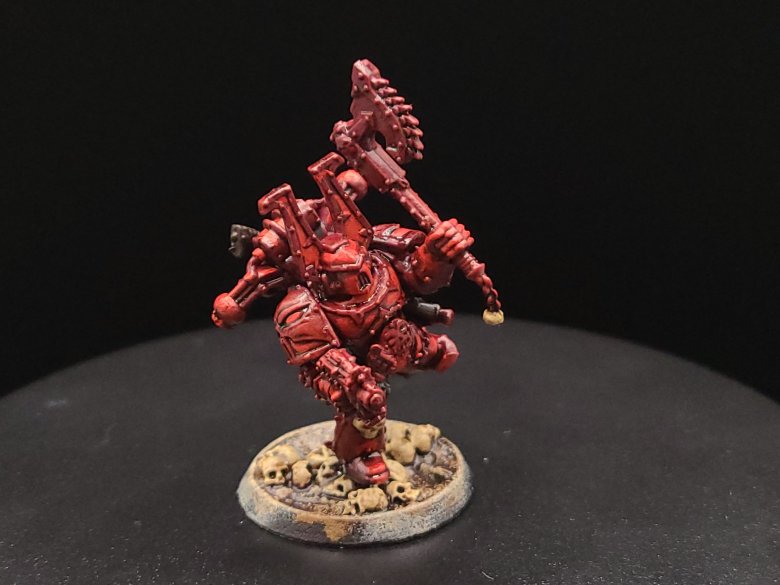
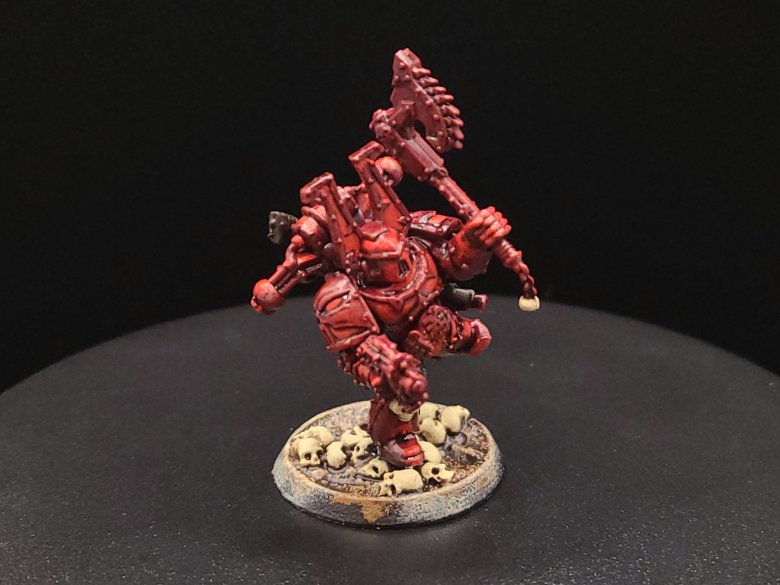
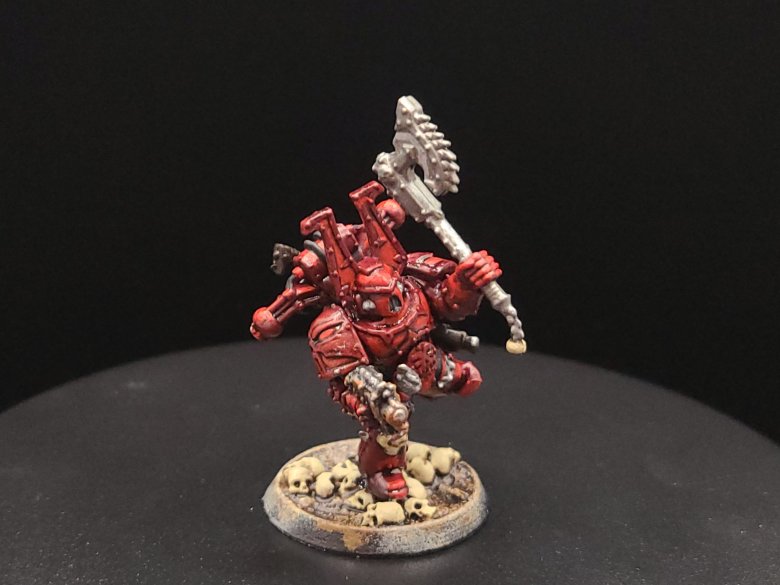
And that, start to finish, is how we turn our little dude from an unpainted gray plastic miniature to a finished Khorne Berzerker! If this goes well between the online stuff and the convention circuit, I hope to also have some tutorials done for other Chaos factions and for Aeldari, which is my personal favorite faction in the game. If you have any questions for me about the tutorial feel free to reach out to me in the comments below, or on Instagram under the handle twitchybristles, where I also post a lot of the miniatures that I paint in my spare time. Thanks again to SmashleyDraws for some of the graphics!
Part 1: https://twitchybristles.ca/2025/06/18/blood-for-the-blood-god-how-i-paint-khorne-berzerkers-pt-1/
(P.S. Boss Ross and God-Emperor Duncan, pls don’t sue me)

Great tutorial Mick
LikeLike