Back at it with another tutorial! Partly for posterity and partly as a reference so that I have it for some convention panels and workshops that I’ll be doing in the future, here’s a primer on my miniature painting method and, specifically, how I recently tackled some familiar-looking pointy-eared lads and lasses. Here I’ll try and show on a beginner level how to go from gray plastic to a completed, finished model.
Our Paint Scheme: Shrine of the Ebon Witch
Many Aeldari (Space elves, my personal favorite faction) dedicate decades of their lives in the pursuit of different ascetic or martial paths before either becoming lost on that path for life, or selecting a new one. Among these are the Path of the Dire Avenger, Howling Banshee, Striking Scorpion, or Fire Dragon among others.
The Shrine of the Ebon Witch is a shrine dedicated to the Howling Banshee martial aspect but their paint scheme is also a great match for Craftworld Ulthwe, one of the most renowned (and infamous) of the Aeldari Craftworlds. To the Imperium of Man, the Aeldari are sometimes friend and sometimes foe, and often capricious Xenos species.

What You’ll Need – Paints
Black/Gray:
Games Workshop: Abaddon Black, Mechanicus Standard Grey, Administratum Grey, Ulthuan Grey (Optional)
Vallejo: Black, Green Grey, Sky Grey, White Grey,
Black Wash: Nuln Oil
Brown and Bone:
Games Workshop: Steel Legion Drab, Zandri Dust, Ushabti Bone, Screaming Skull
Vallejo: Flat Earth, Gold Brown, Buff, Ivory or Off-White
Brown Wash: Agrax Earthshade (Liquid Talent)
Metallics:
Games Workshop: Abaddon Black, Leadbelcher, Runefang Steel, Screaming Bell, Hashut Copper
Vallejo: Black, Silver, Copper
Brown Wash: Agrax Earthshade
Black Wash: Nuln Oil
Blue Wash Options (optional): Coelia Greenshade, Stormfiend (Contrast, optional)
Eyes / Lenses:
Games Workshop: Abaddon Black, Thousand Sons Blue, Ahriman Blue, Baharroth Blue, Khorne Red, Mephiston Red, Evil Sunz Scarlet, , Corax White
Vallejo: Black, Dark Blue, Andrea Blue, Sky Blue, Dark Red, Carmine Red, Vermilion Red, White.
Flesh (Optional bc flesh is weak):
Games Workshop: Rhinox Hide, Skrag Brown, Bestigor Flesh, Kislev Flesh
Vallejo (personal choice) : Flesh, Air Flesh
Red Wash: Reikland Fleshshade
Brown Wash: Agrax Earthshade
THE MOST IMPORTANT RULE:

Tutorials like this one are just a guideline! The colors can be anything you want them to be.
It’s your world, you’re the creator, and you can do anything you want on your canvas.
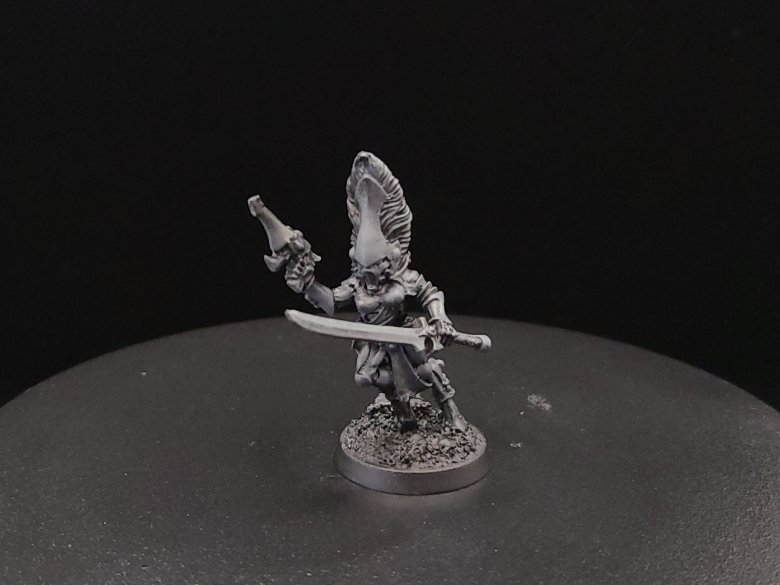
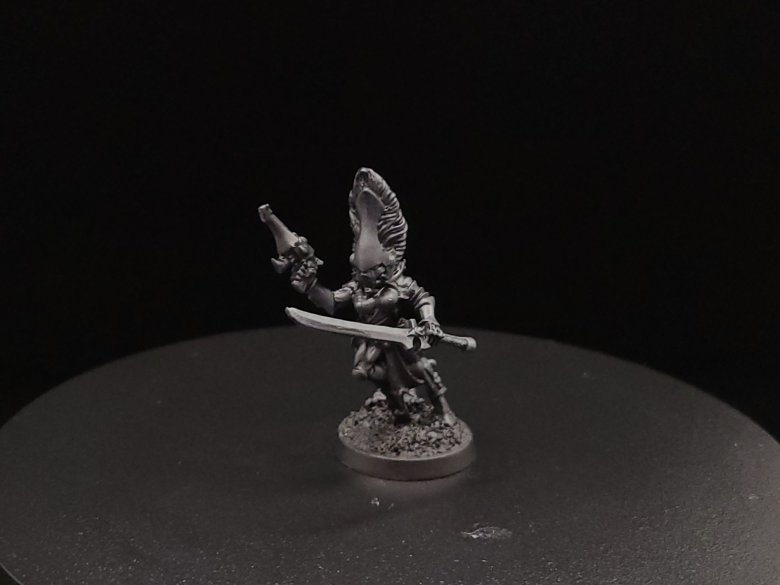
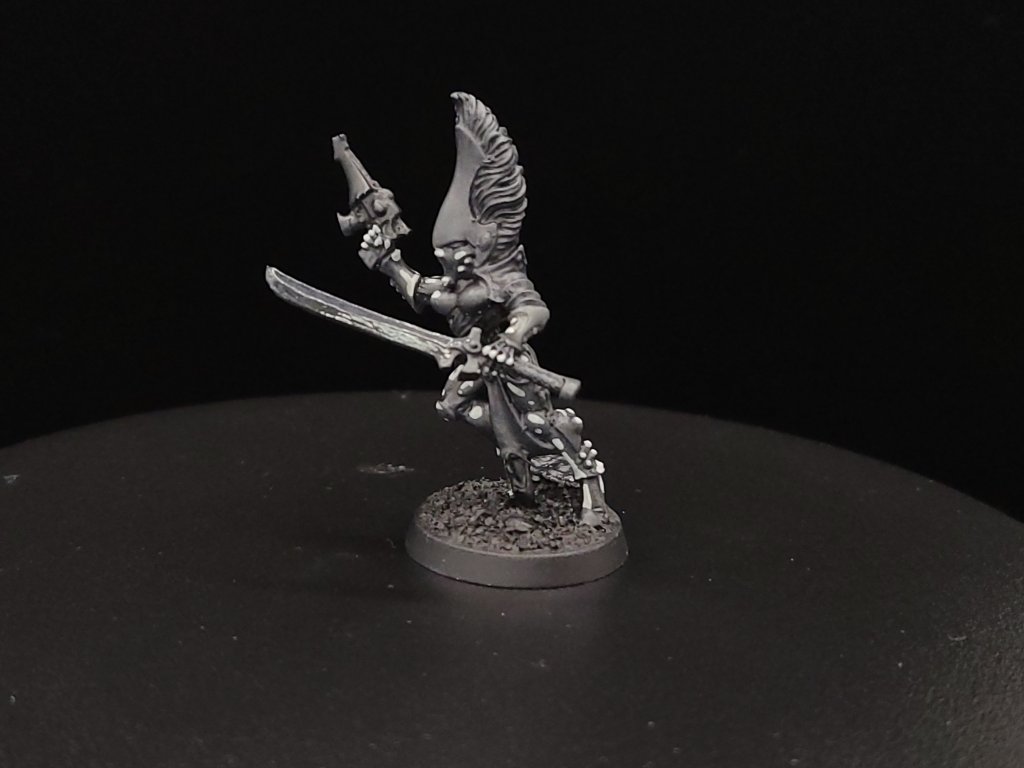
Black (Base Coat) :
First, we start by base coating our model. Thinning your paint down a little, and using a medium-sized brush, apply either Abaddon Black or Vallejo Black to taste. Remember that it’s always better to apply a couple of thin coats than a thick coat, to keep the recessed areas clear and to keep from obscuring detail on your model.
Dark Grey (Drybrush) :
Take a larger brush and add some of your Mechanicus Standard Grey or Green Grey to it, without watering it down at all. Brush the excess paint off onto a paper towel or your parchment paper until you notice that no more of the wet paint is coming off, or that a lighter amount of pigment is being applied.
Apply your drybrush in back and forth brushing strokes over the model’s surface – this will keep recesses dark and clear but make it appear that the light is reaching areas that stick out more on top. This can help mark out or distinguish what raised details are going to need highlights later.
You can also just apply your dark grey color with a fine detailed brush over details that should be raised or where you want the light to be hitting.
Black (Wash) :
Brush off a little excess after you dip your brush in the Nuln Oil because you want to avoid flooding the model you’re working with. Remember, a wash can be applied broadly and will sink into the recessed details and darken them from the color of your base coat and add more depth to the model.
Look out for excess wash paint collecting in little pools or blobs – you can either push or pull it around with your brush to areas with less coverage while wet or use a paper towel or sponge to try and soak up any excess.
If you drybrushed before, you can apply a light drybrush coat again after this stage or you can apply a little of your dark gray with a detail brush to clean up if you think the wash might have darkened things up too much.
Grey (Edge Highlights) :
Now that the wash is done, we’re going to apply highlights using Administratum Grey or Sky Grey, which is the most time-consuming part of the process. Here, you pick out what you think are the most extreme raised details or the places on the model that you think should be brightest from your light source. Apply this carefully with a fine detail brush.
A few tips on highlights – make sure that you have your elbows firmly planted on the table and feet on the ground, and try to also work under a good light source if at all possible.

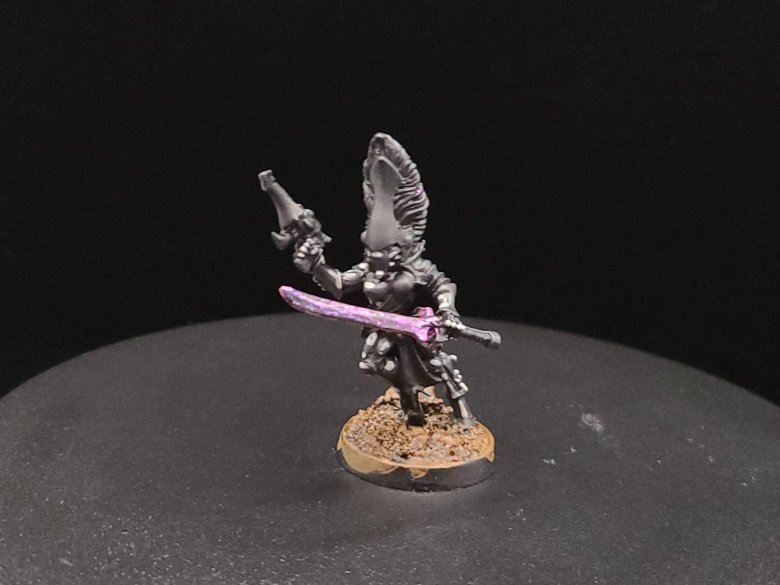
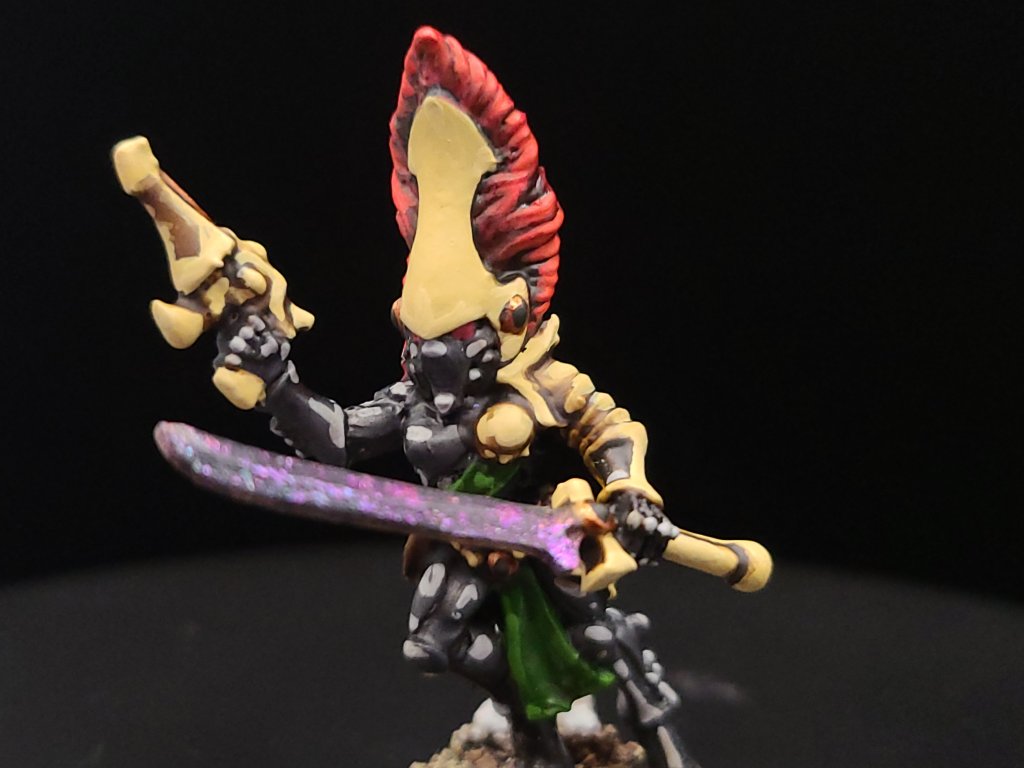
Optional: Nail Flakes
One of the fun parts of the hobby is experimentation, or finding new uses for things that come from outside of the miniature painting scene. Nail polish flakes can be a great way of adding an easy holographic effect to power swords and other “glowy” sections.
With the black colors done, we’re going to apply a glossy black over the blade or apply some ‘Ardcoat over the blade to give it a nice gloss.
Next, we’re going to use a blend of water and some gloss varnish to apply the flakes – be careful not to overdo the varnish or it will break the flakes down too much. Also try not to over-apply flakes or you’ll lose some nice natural contrast and obscure details.
Once this is done, apply some ‘Ardcoat after the flakes have dried on, and you have a very fancy-looking new power sword!


Brown (Base) :
A good rule of thumb is to paint colors in order of what covers the most surface area. There’s lots of exceptions to this, but here we’re going to paint our brown with two thin coats of either Steel Legion Drab or Vallejo Flat Earth on the base to represent the ground our dude is on.
At the same time, we’ll use a darker brown, like Rhinox Hide, to cover over any of the places on the model that we want to represent leather holsters, sheaths, or straps. You can also add lighter brown edge highlights to the leather parts to add a little more depth.

Brown (Wash and Drybrush) :
Once we have our base coat applied, we’re going to apply a wash of Agrax Earthshade to get down into the recesses and give our basing more definition, as well as up on the leathery parts. On the leather parts, if you did highlights you’ll notice that the wash also acts as a glaze helping to tie your two leather colors together.
Once the wash is dried, apply a light drybrush of Flat Earth or Steel Legion Drab to your base to add more contrast – this will help a lot with the next step.
Bone (Drybrush) :
Instead of adding a base coat, we’re actually going to skip ahead and apply our Bone color, either Ushabti Bone or Vallejo’s Buff. We’re going to apply this by drybrush only to the basing, and it will work as a highlight on the ground but will also naturally mark out any parts of the skulls that are going to be highlighted or raised, or that you want to stand apart.
We can also add a base coat of our Administratum Grey or Sky Grey to any rocks on the basing to develop later.

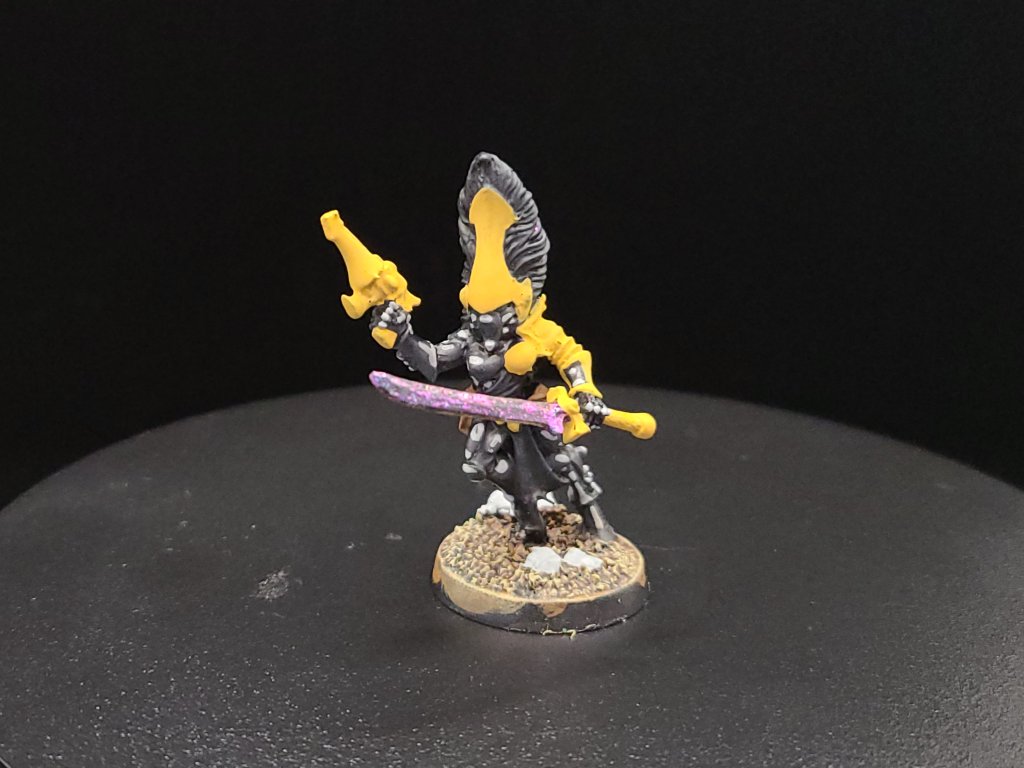
Bone (Base and Wash) :
Next, we’re going to apply two thin coats of either Golden Brown or Zandri Dust as a base coat to all of the bone-colored details on the helmet, pistol and swords, but we’re also going to use this to paint any of the skull pieces on the basing. After these coats are dry, use a lightened wash of Agrax Earthshade to give these bone pieces a little more definition. You can do this by adding a little Matte Medium, Contrast Medium, or even water to your shade.
Also apply this to your basing rocks – you will come back to highlight these later on.

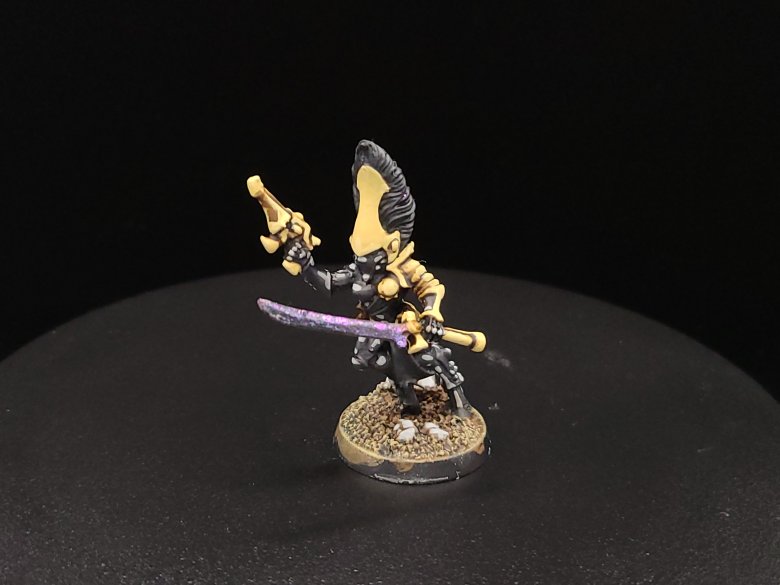
Bone (Highlight) :
With a small brush, apply Buff or Ushabti Bone again to the most raised parts of the helmet, pistol and swords. We’re then going to repeat the previous wash coat step by applying a blend of Agrax Earthshade and either water or Lahmian Medium to keep it toned down.


Bone (Highlight) :
Here, we’re going to repeat the previous steps once that light coat of Buff or Ushabti Bone is dry. With lighter colors, using light washes and a slow, steady buildup of colors can be a great way (though time consuming) to build up some extra definition.
Now is also a good time to apply some Sky Grey or Administratum Gray to edges of your basing rocks that you want to highlight.
Last, once we have applied either Buff or Ushabti Bone with our alternating Agrax Earthshade washes a couple times, we will use a light blend of Buff and Ivory or Ushabti Bone and Screaming Skull to mark out some extreme highlights at upper corners or places where we want to show light hitting surfaces.
After this, use either White Grey or Ulthuan Grey to mark out extreme highlights on your basing rocks.
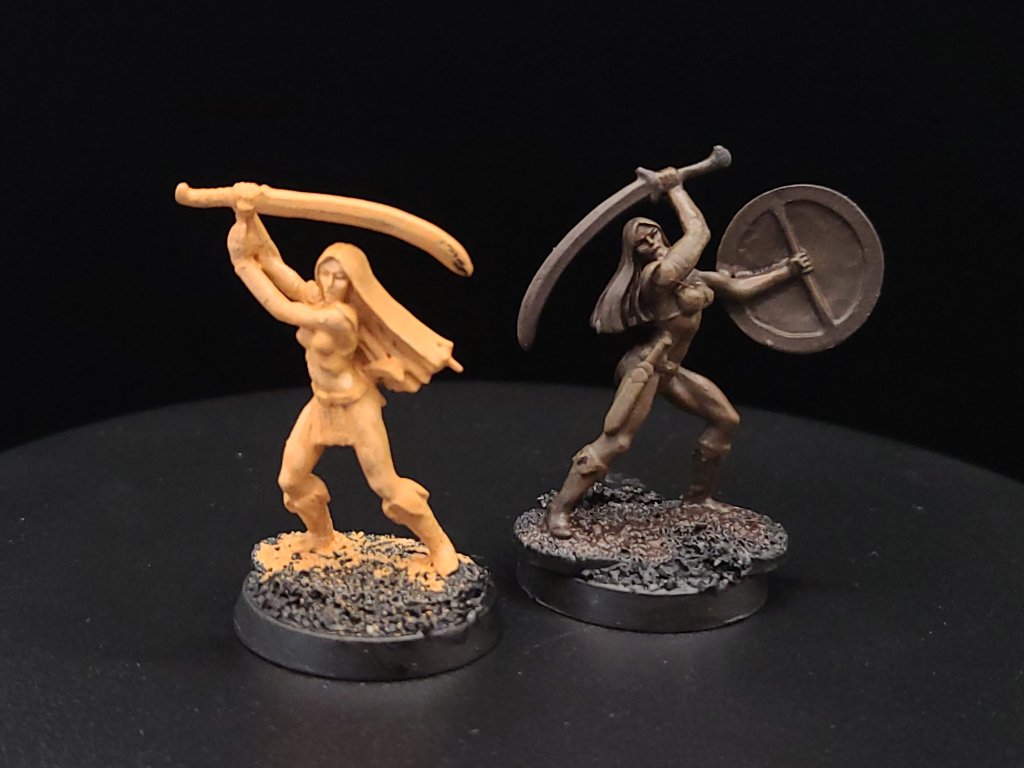
Flesh (Optional) :
Not all our little dudes have their helmets on, and so here’s a quick way that you can paint on your fancy little space elves.
Start either with a light base skin tone like Bestigor Flesh or a darker base skin tone like Rhinox Hide in two thin coats.
(Here, we’re using some old Ral Partha metal miniatures as examples of these skin tones but you can apply these colors to anywhere on your model showing skin.)


Flesh (Wash and Highlight) :
Apply a soft highlight – blend Bestigor Flesh and Kislev Flesh, Rhinox Hide and Skrag Brown, or mix your own colors to taste to build up highlights before we add a wash.
Once the base and highlight colors are done, you can apply Reikland Fleshshade to your model if you’re painting a fair skin tone or Agrax Earthshade for darker skin – these washes tie the two previous colors together and make the blend look a lot more natural.
Do one last highlight with your blended color or a brighter tone once the shade paints dry.

Red (Base) :
Since we usually paint in order of what takes up the most surface area, once the bone colors are done we can move on to red – this is useful for any hair showing on your miniatures or any helmet plumes or manes your space elves might have.
Apply two thin coats of Dark Red or Khorne Red, careful not to get red on any of the dark grey or bone-colored sections you’ve finished. If you have a small enough drybrush, you can apply some Mephiston Red or Carmine Red here too.

Red (Wash / Highlights) :
Brush off a little excess after you dip your brush in the Carroburg Crimson because you want to avoid flooding the hair/mane area. Apply a wash of Reikland Fleshshade to give your red base a bit of an orange tint – this won’t look great right now but we’ll add depth in our next step.
Using Mephiston Red and Carmine Red, and a fine detail brush, apply red along each of the hairs on the mane or on the model’s head that stand out, or sections where you want to restore some of the brightness we lost with the wash.
Next, you can use Vermilion Red or Evil Sunz Scarlet to brighten the very top edges of the hairs or details that we touched on in our last highlights.
To add an orange tint to match our Reikland Fleshshade, as an optional step you can also blend in a little Orange Red or Trollslayer Orange to make your these stand out more from our red base colors.


Green (Base) :
Aeldari models often have tabards or other cloth bits, and for our Craftworld/Shrine here we’re going to go with a forest green color for those. To start, apply a couple thin coats of a color like either Olive Green or something like Caliban Green for a deeper green color.
Green (Highlights and Wash) :
With our base coat down we’re going to apply a Uniform Green as an edge highlight over our cloth, or if you used Caliban Green in the previous step you can apply a medium green like Warpstone Glow.
Once these are down, we’re going to apply a wash of Athonian Camoshade for a nice forest green or Biel-Tan Green for something a little deeper.
Last, we’ll apply a highlight of Uniform Green or Warpstone Glow, the same colors we used in our previous step before the wash, but then we’re going to build up an additional highlight over them once they’re dried.
Apply Lime Green or Moot Green to the extreme edges to build a nice blend of colors.

Metallics (Base, Wash and Highlight) :
Now, we’re going to apply our metallic colors – these make great housings around larger gems on your Aeldari and also work nicely for blades if you didn’t use the nail flakes earlier. For a nice copper color, apply some Screaming Bell to the gem housings or blade-hilts, and you can use Leadbelcher as a nice dark silver base for your swords.
Next, we’re going to apply a wash of Reikland Fleshshade over our copper to keep a nice bright red-orange color.
With silver, we have more options: You can apply Nuln Oil for a worn or dark metallic look, or you can use a color like Coelia Greenshade, or a blend to get a bluer hue.
Once you apply your washes, use Hashut Copper to build up the shine on your copper sections and Runefang Steel to highlight your silver metallics.
Gems (Base) :
One striking detail about space elves is that they are usually festooned with little gems – to paint these, we start by taking a fine detail brush and undercoating the full surface of the gems in either Black or Abaddon Black.

Gems (Base and Highlight) :
You can either paint all of your gems the same color or use different colors to mark out your eyes or other special details from the rest of the gems.
Here, we’ll use Dark Red or Khorne Red for the helmet lenses at the same time that we use a Dark Blue or Thousand Sons Blue for the gems on the rest of the body and weapons. For eyes or helmet lenses, apply paint along the inside of the eyes, near the bridge of the nose, and with your gems apply towards the bottom away from your light source.
Once your base colors are done to color your gems and lenses, apply either Carmine Red or Mephiston Red to the inside of the lenses again, covering just a little less surface area. Do the same with Andrea Blue or Ahriman Blue, covering just a little less surface area but hugging the bottom of the gem.
Next, we’re going to repeat the last step and highlight the red areas with a Vermilion Red or Evil Sunz Scarlet, and the blue sections with Sky Blue or Baharroth Blue, covering even less space.
Last, but definitely not least, add a little dot of White or White Scar to wherever you think the light would be directly hitting your gem – the dot might be small and subtle but it does a lot of work on making the effect look right.


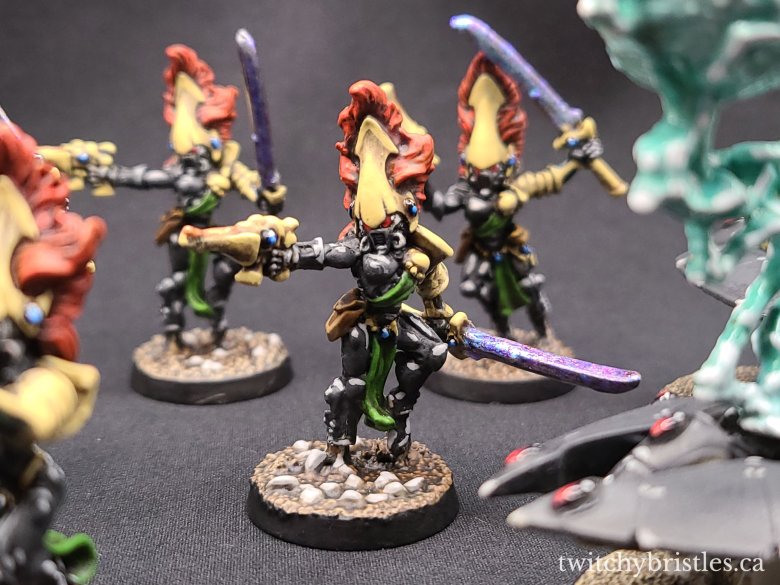
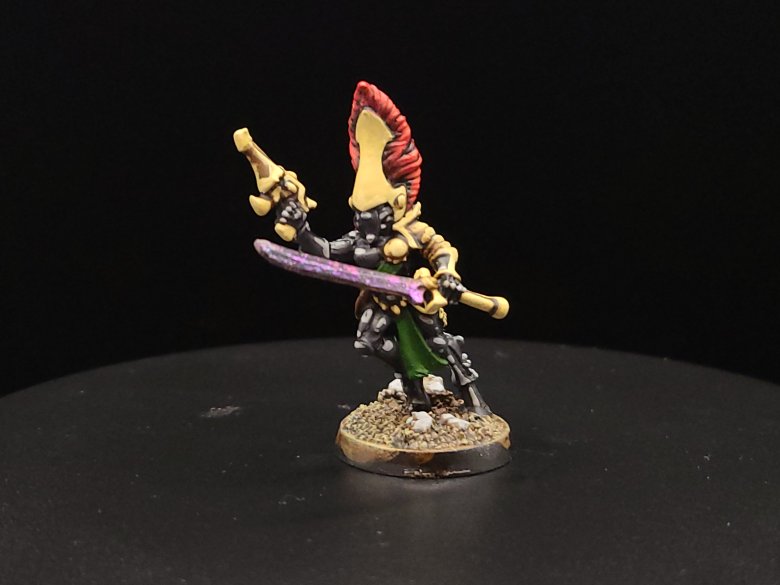
And that, start to finish, is how we turn our little dude from an unpainted plastic or pewter miniature to a finished Howling Banshee! You can apply these scheme to your Guardians, Jetbikes, and other space elves too. If you have any questions for me about the tutorial feel free to reach out to me in the comments below, or on Instagram under the handle twitchybristles, where I also post a lot of the miniatures that I paint in my spare time. Thanks again to SmashleyDraws for some of the graphics!
