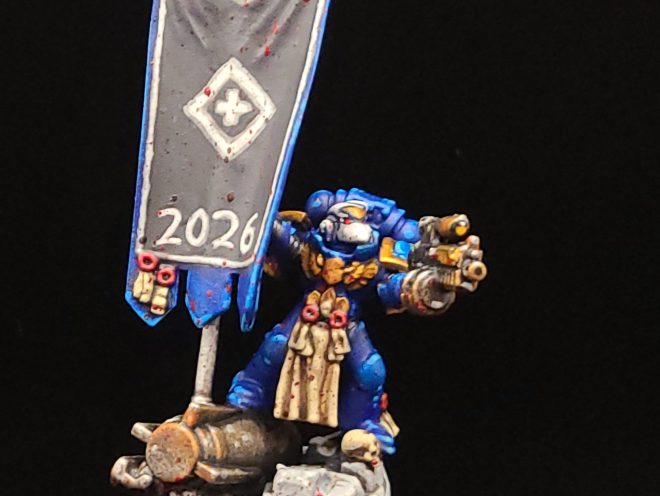
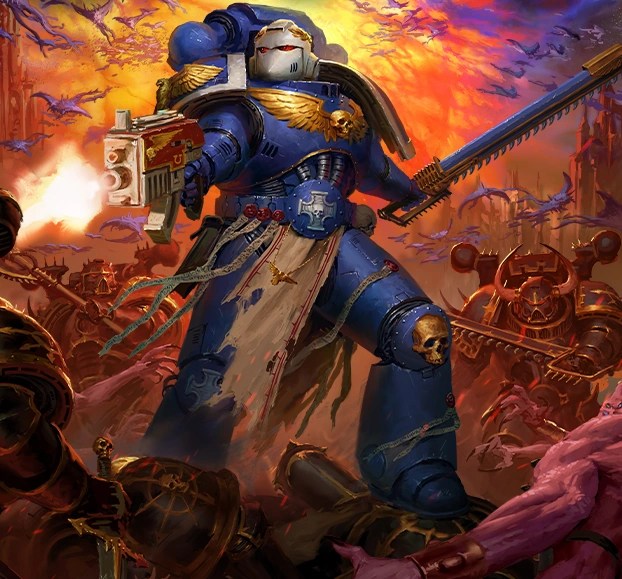
Space Marines are super-soldiers created through grueling physical augmentations and with the genetic material of the Primarchs, who maintain rigid discipline, traditions, and values from their individual legions. They operate as highly mobile strike forces. Malum Caedo, a Sternguard Veteran, is an elite among elites. The same way that Space Marines are the most iconic factions of the Warhammer 40,000 tabletop game, the Ultramarines are one of the game’s most revered and recognizeable Space Marine chapters. The storied XIII Legion is one of the original twenty Space Marine Legions and is led by Primarch Roboute Guilliman, the current Lord Commander and Imperial Regent of the Imperium of Man. This chapter is known in-game by a multitude of disparaging nicknames (See: Rowboat Girlyman, Blueberries, Smurfs) and are visually defined by by iconic blue armour adorned with golden trim.
Now that I’m done plagiarizing Lexicanum, if you’re ever wanted to start painting Ultramarines or want a quick, easy start-to-finish guide on painting your little blue dudes, what follows is a step by step guide on how to paint Malum Caedo, my personal favorite Ultramarine, and if you stick around to the end I have something pretty cool to share, too. I’ll go over options of paints from two companies – Games Workshop, based in the United Kingdom, and Vallejo, based in Spain. When it comes to washes I’m just going to mention Games Workshops because they’re pretty readily available at retailers and I find especially early on they get great results. I posted a guide earlier on my blog detailing the basics of getting your miniature based, primed, and ready for painting.
Colors that you’ll need:
Black/Gray:
•Games Workshop: Macragge Blue, Calgar Blue
•Vallejo: Model Color Blue, Andrea Blue, (optional) Sky Blue
•Blue Glaze: Vallejo (Air) Blue, or your choice of Contrast Blue
Gray:
•Games Workshop: Mechanicus Standard Gray, Administratum Gray, White Scar
•Vallejo: Green Gray, Sky Gray, White Grey
•Washes: Agrax Earthshade (Liquid Talent), Nuln Oil
Black:
•Games Workshop: Abaddon Black
•Vallejo: Black
Metallics:
•Games Workshop: Leadbelcher, Runefang Steel, Retributor Gold, Trollslayer Orange
•Vallejo: Gunmetal, Silver, Gold (your choice), Orange Red
•Brown Wash: Agrax Earthshade
•Black Wash: Nuln Oil
Bone Colors:
•Games Workshop: Zandri Dust, Ushabti Bone, Screaming Skull
•Vallejo: Gold Brown, Buff, Off-White
•Wash: Agrax Earthshade
Red (Seals and Lenses):
•Games Workshop: Khorne Red, Mephiston Red, Evil Sunz Scarlet, White Scar
•Vallejo (personal choice) : Dark Red, Carmine Red, Vermilion, White
•Red Wash: Carroburg Crimson
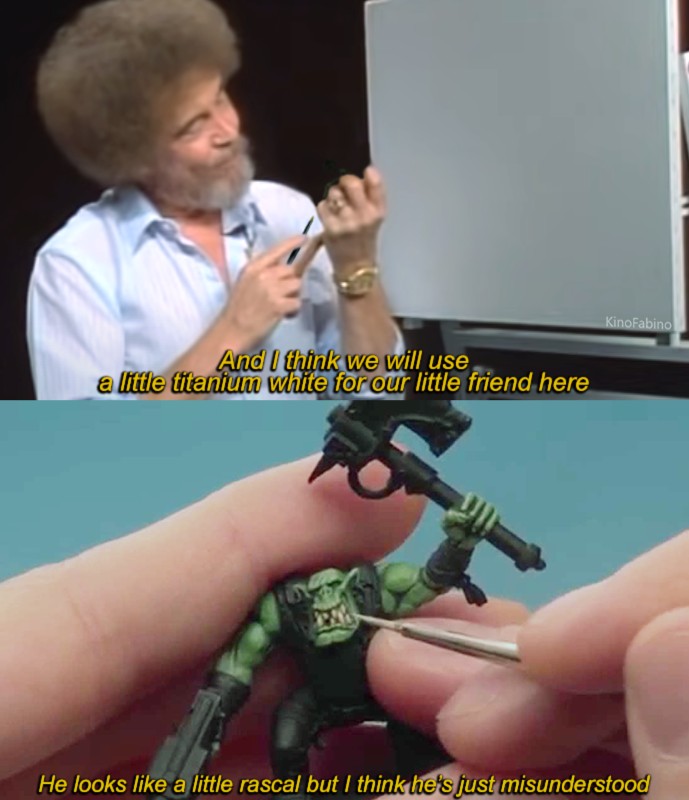
Remember, tutorials like this one are just a guideline! The colors can be anything you want them to be.
It’s your world, you’re the creator, and you can do anything you want on your canvas. Be like Bob!
Blue:
First, we start by base coating our model. Thinning your paint down a little, and using a medium-sized brush, apply either Macragge Blue or Vallejo Model Color Blue to taste. Remember that it’s always better to apply a couple of thin coats than a thick coat, to keep the recessed areas clear and to keep from obscuring detail on your model.
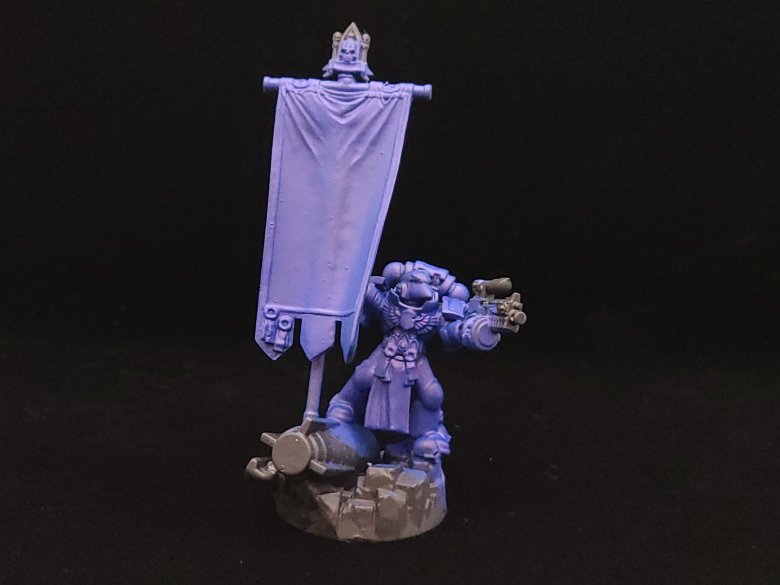
Take a larger brush and add some of your Calgar Blue or Andrea Blue to it, without watering it down at all. Brush the excess paint off onto a paper towel or your parchment paper until you notice that no more of the wet paint is coming off, or that a lighter amount of pigment is being applied.
Apply your drybrush in back and forth brushing strokes over the model’s surface – this will keep recesses dark and clear but make it appear that the light is reaching areas that stick out more on top. This can help mark out or distinguish what raised details are going to need highlights later.
You can also just apply your light blue color with a fine detailed brush over details that should be raised or where you want the light to be hitting.
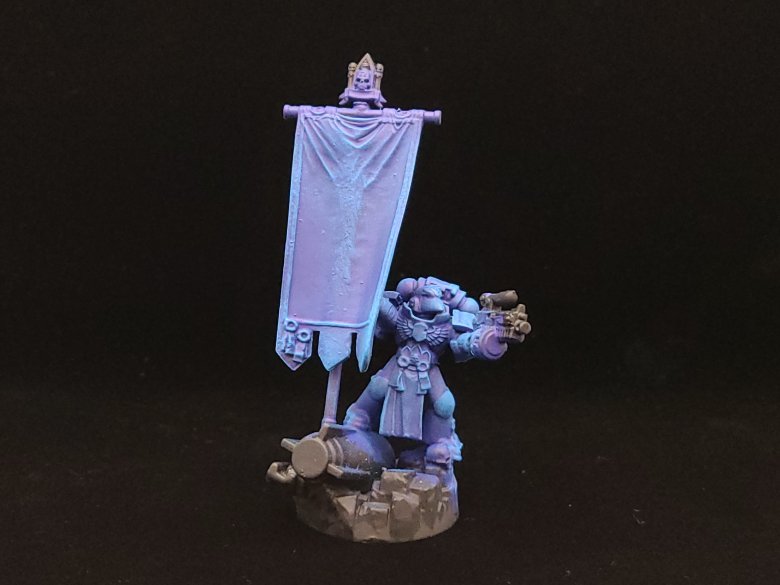
Before you move on to the wash/glaze step of the process, if you want you can take one of your small, detail brushes and apply another coat or two of the light blue color you selected in the previous step, highlighting the upper or raised edges that you think that the light source over our miniature would be most drawn to.
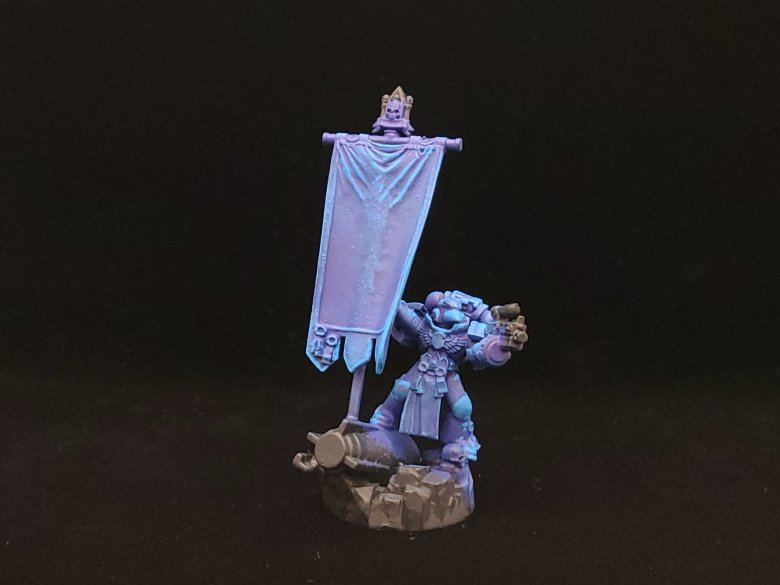
Brush off a little excess after you dip your brush in Vallejo Air Blue because you want to avoid flooding the model you’re working with. (If you don’t have Vallejo Air Blue, contrast paints or a dark blue wash will work here as well.) A wash can be applied broadly and will sink into the recessed details and darken them from the color of your base coat and add more depth to the model. I would thin these down with Contrast Medium or an Acrylic Medium, especially with the Air Blue, where a little can be a lot.
Look out for excess wash paint collecting in little pools or blobs – you can either push or pull it around with your brush to areas with less coverage while wet or use a paper towel or sponge to try and soak up any excess.
If you drybrushed before, you can apply a light drybrush coat again after this stage or you can apply a little of your dark gray with a detail brush to clean up if you think the wash might have darkened things up too much.
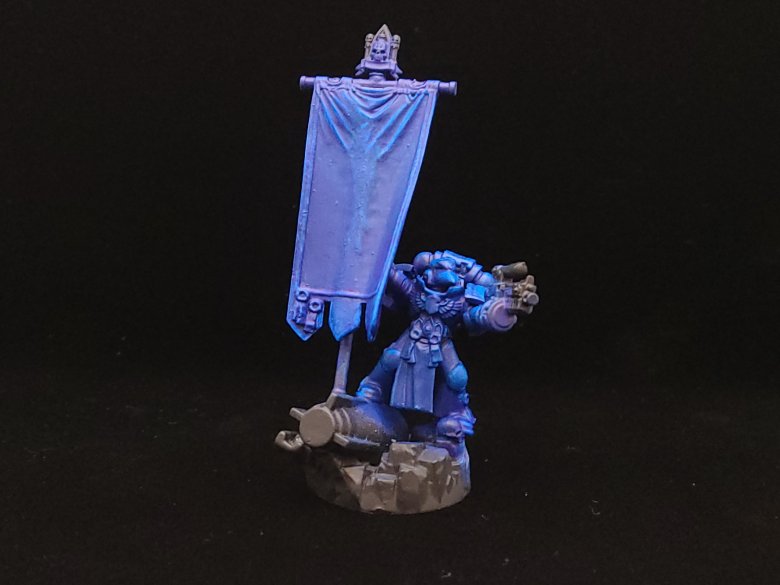
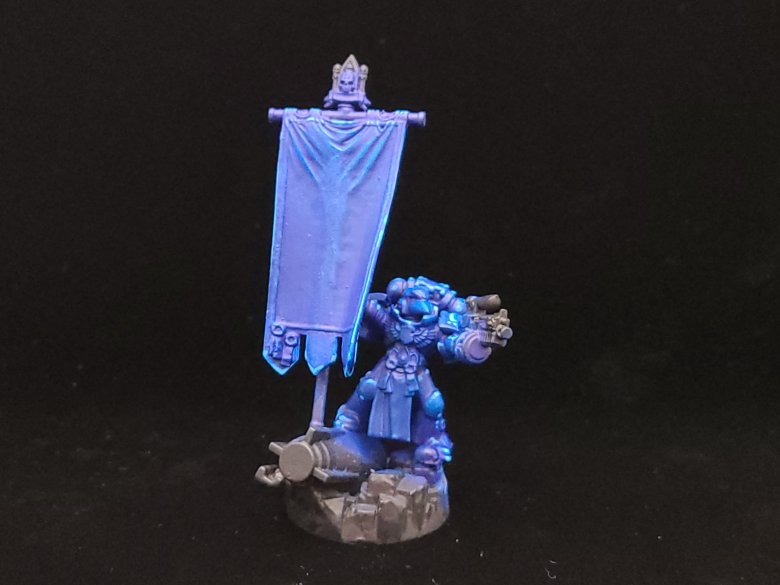
This step will look especially good if you did the optional highlights earlier, but now that we have applied our wash or our glaze, we can take a small detail brush and again, just apply a little of our light blue color where we think the light would touch, at the most raised edges of the model. The result should be a nice gradient that goes from a dark blue in the recesses and undersides to a nice crisp, light blue.
Black/Gray:
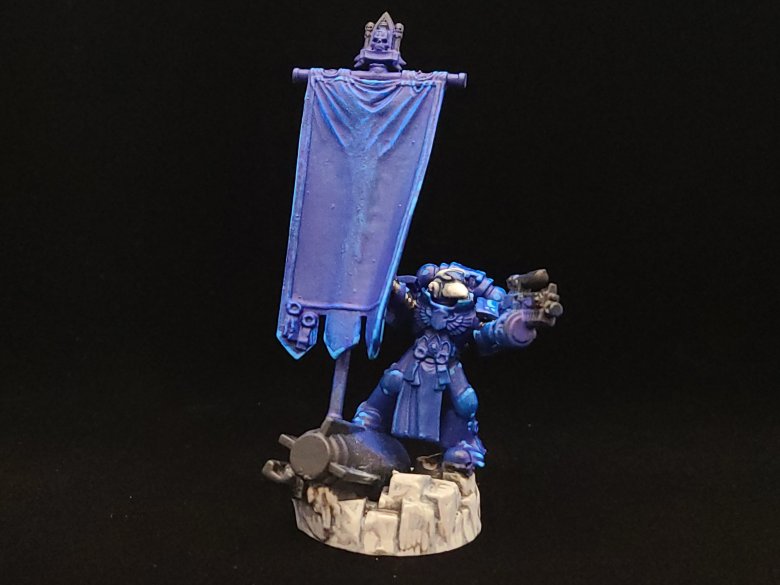
A good rule of thumb is to paint colors in order of what covers the most surface area. There’s lots of exceptions to this, but here we’re going to paint our gray with two thin coats of either Mechanicus Standard Gray or Vallejo Green Gray on the base to represent rocks.
Apply this in two thin coats, but you can also start to apply this to gaps in our space marine’s armour, as we’ll do in the next slide. Start by base coating those gap areas black and then applying green gray to the bands.
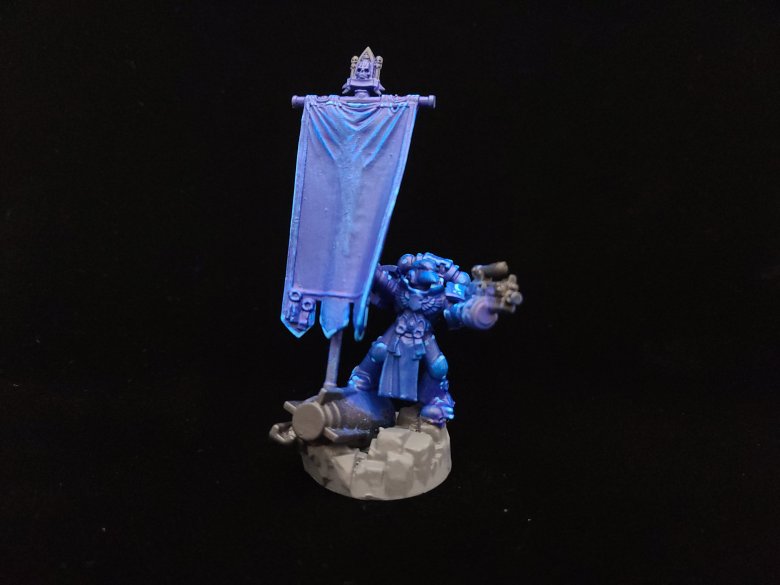
Once the dark gray is in those gap areas between the Power Armour where we can see a banded material underneath, we’re going to apply a Nuln Oil black wash over them, and once that wash dries we’re going to use a small detail brush to paint the middle of the individual bands to highlight them.
Once that’s done, a very small dot of either Administratum Gray or Vallejo Sky Gray will help to sell the illusion that the bands of the armour are there.
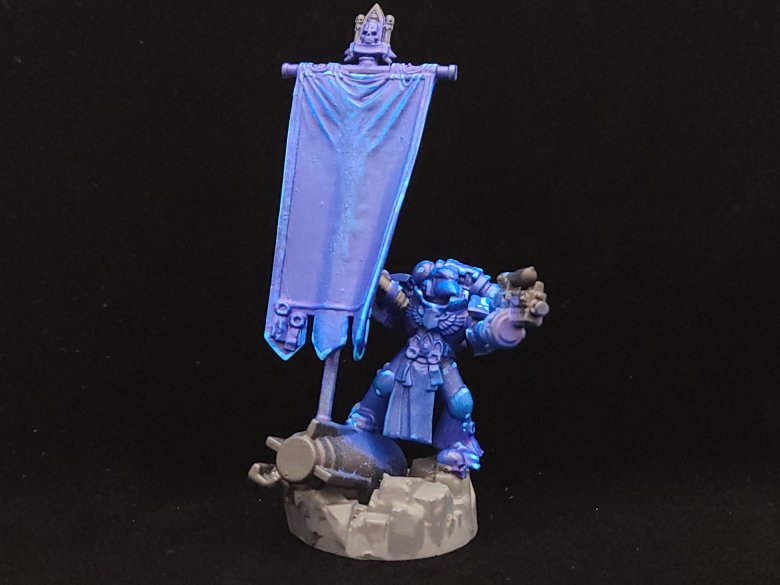
Next, we can either drybrush some light gray onto our basing or, if we’re feeling especially dedicated, we can paint individual rocks in light gray to build up some color contrast with the dark gray underneath. This is the same color we used to finish our under-armor “bands” and we’re going to use this to also start blocking off the raised parts of the helmet.
(Malum Caedo is a special little dude, so he gets a special little helmet.)
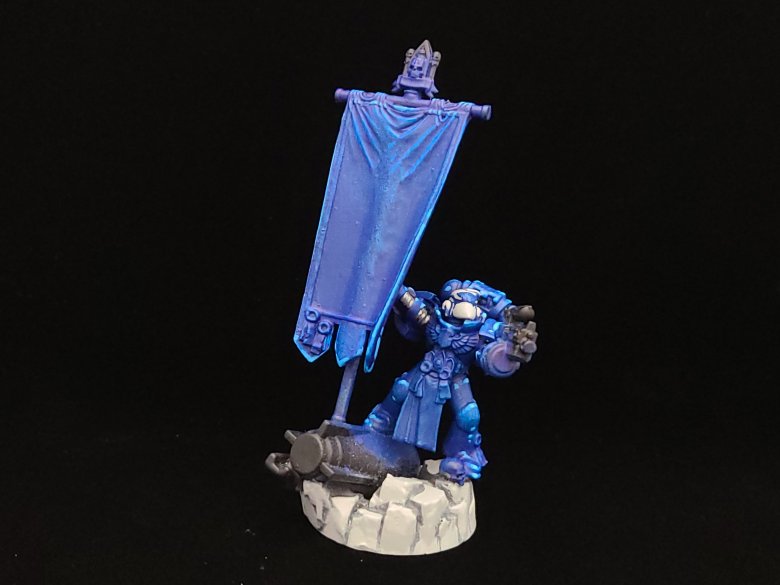
We’re going to apply a wash now both to our basing and to the helmet, but we’re going to do them both a little differently. With the helmet, we’re going to apply Nuln Oil as a black wash, and for the base we’re going to blend our Nuln Oil 50/50 with Agrax Earthshade for a darker, dirtier-looking brown wash than just straight Agrax Earthshade.
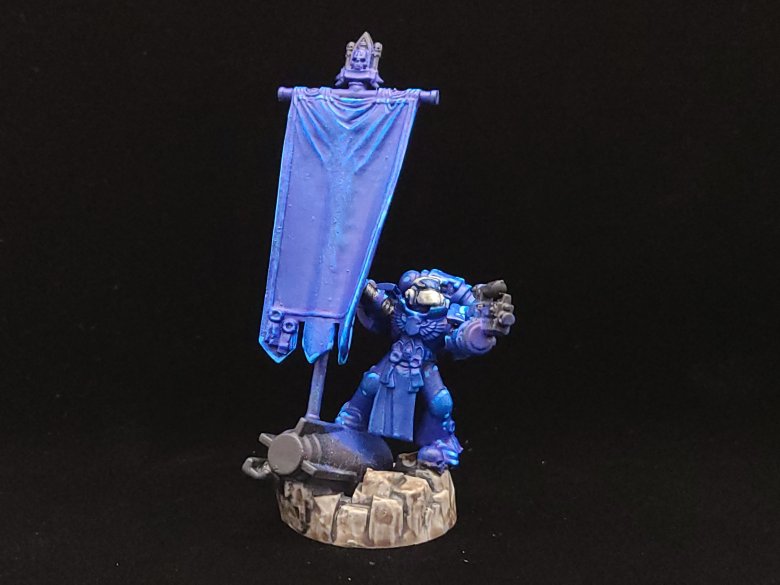
Now that our washes have dried, we’re going to use the light gray, either Administratum Gray or Sky Grey, to build up the colors on our helmet and basing. Once this is done, we’re going to go even lighter – we’ll add some white to our Administratum Gray to taste or you can just use Vallejo White Gray on our helmet to get a nice almost-white look, and we’ll blend that lighter color 50/50 with our Administratum Gray or Sky Gray to do some highlighting on the basing.
Metallics:
If you thought we were done with the black colors, not quite – we’re going to use them now to block off the Boltgun and the torpedo on our basing so that we’re ready to do our metallic colors. You can probably do this on the stand for the banner or similar accessory items but you can also skip this if you don’t want to obscure details there too much. We’ll need the bolter and torpedo solid black for when we play with sponge brushes.
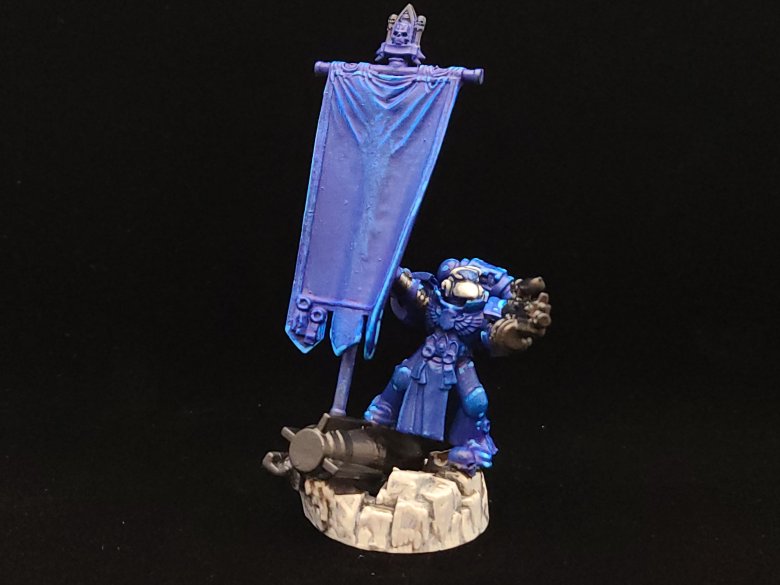
Sponge brushes are a great way to get unique textures on our model – we’re going to apply Leadbelcher or Vallejo Gunmetal Gray to anywhere that should be a solid silver like the stand for our banner or the undersides of our power packs, but we’re going to use sponge brushes to lightly tap the same color over the torpedo and boltgun to get a grungy and textured weathering effect.
Once this is dried, we’re going to highlight some lighter silver with either Runefang Steel or Vallejo silver, using a new sponge brush again to brush on easy highlights for our boltgun and the torpedo.
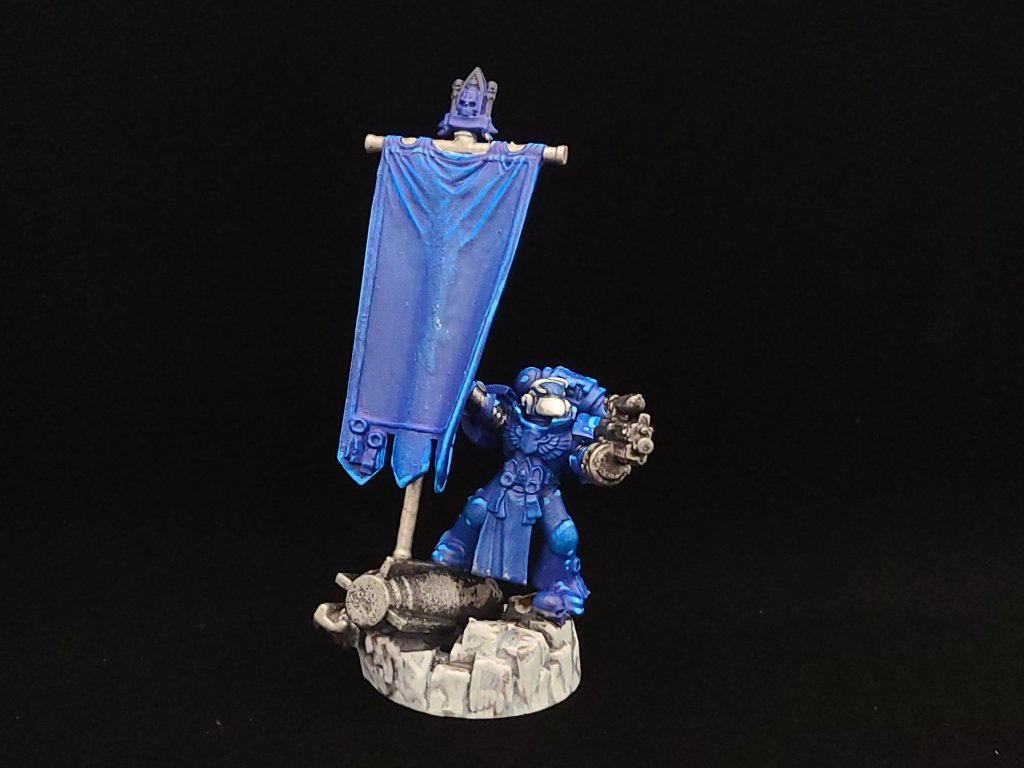
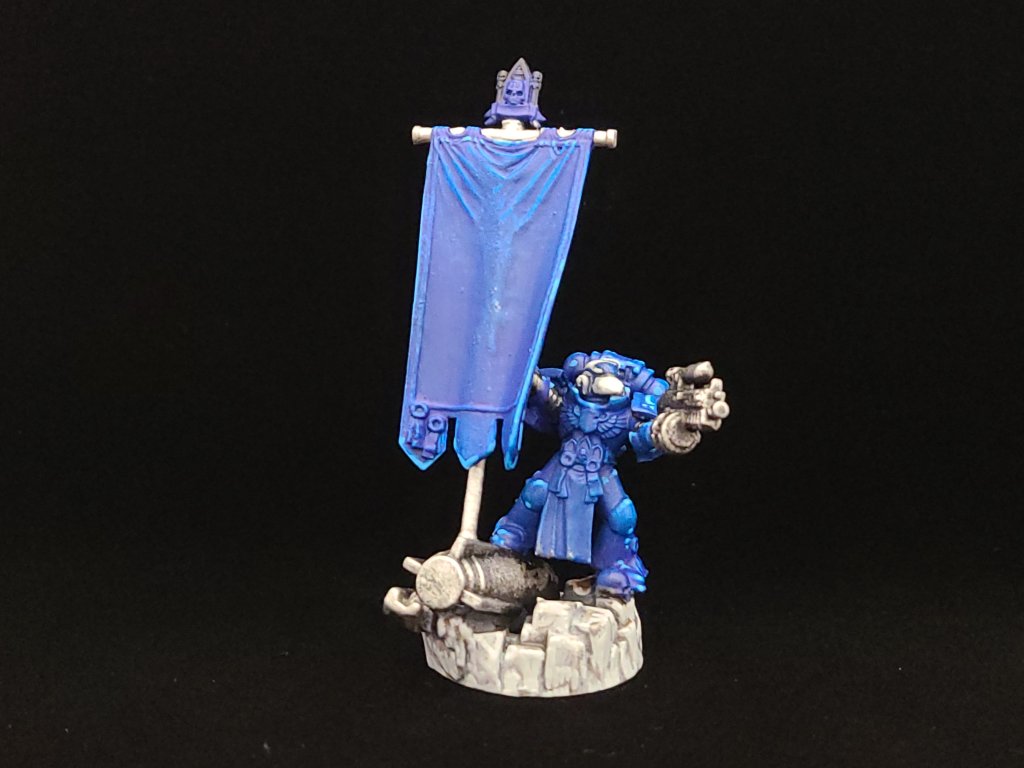
Last, we’ll use our sponge brushes to lightly tap on some Trollslayer Orange or Vallejo Red Orange to our bolter and torpedo to make them look nice and worn, and we’ll come back with our light silver color and apply some light highlights to the edges, to make it look like there’s still exposed metal or chipped metal even through the rust. You can apply that Nuln Oil/Agrax Earthshade wash to your boltgun and other silvery areas.
(I also played “catch up” on this step to freehand our banner in the same colors as the earlier under-armour bands.)
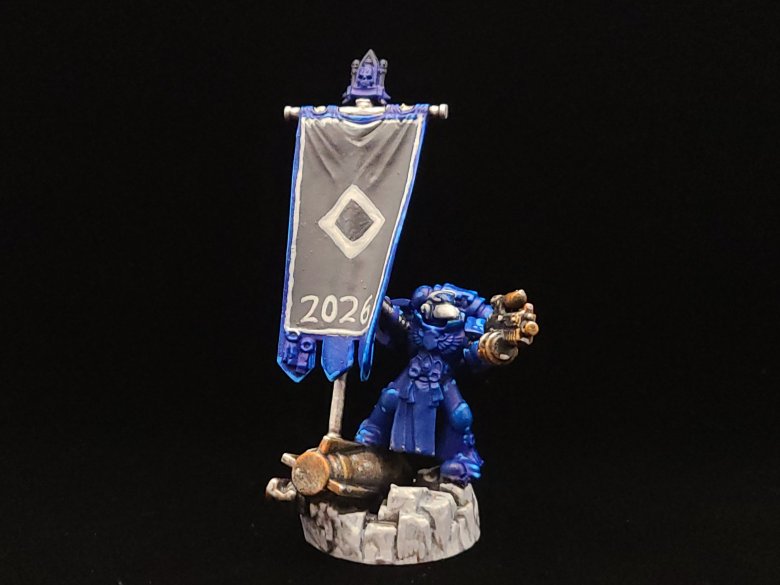
Retributor Gold is a magical pot of paint and I’d definitely recommend it – we’re going to use it for the trim of our armor and all of the “aquilas” and the ornamentation around the skull. Two thin coats of this will leave a nice bright gleaming gold. Later, when you use Agrax Earthshade on your bone tones you can apply it to this as well, or Reikland Fleshshade for an even brighter effect, before highlighting with more Retributor Gold.
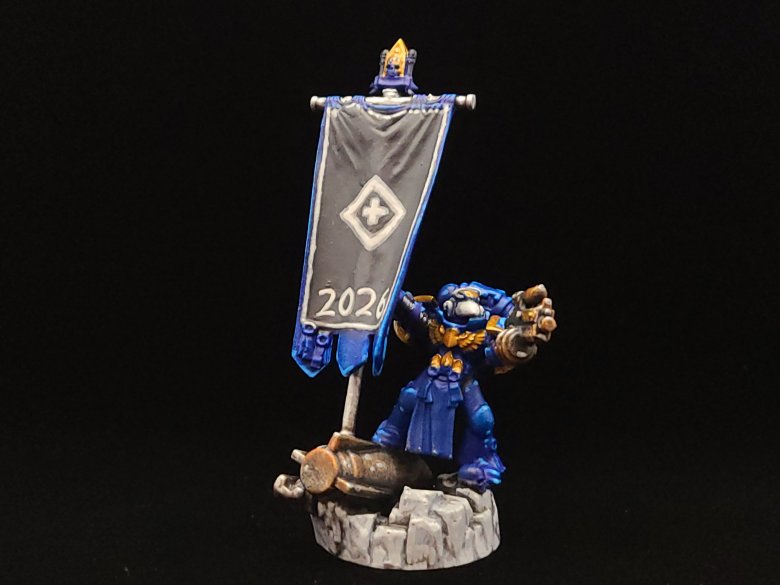
Bone Colors:
Next, we’re going to apply two thin coats of either Golden Brown or Zandri Dust as a base coat to all of the bone-colored details on the skulls and tabards. After these coats are dry, use a lightened wash of Agrax Earthshade to give these bone pieces a little more definition. You can do this by adding a little Matte Medium, Contrast Medium, or even water to your shade.
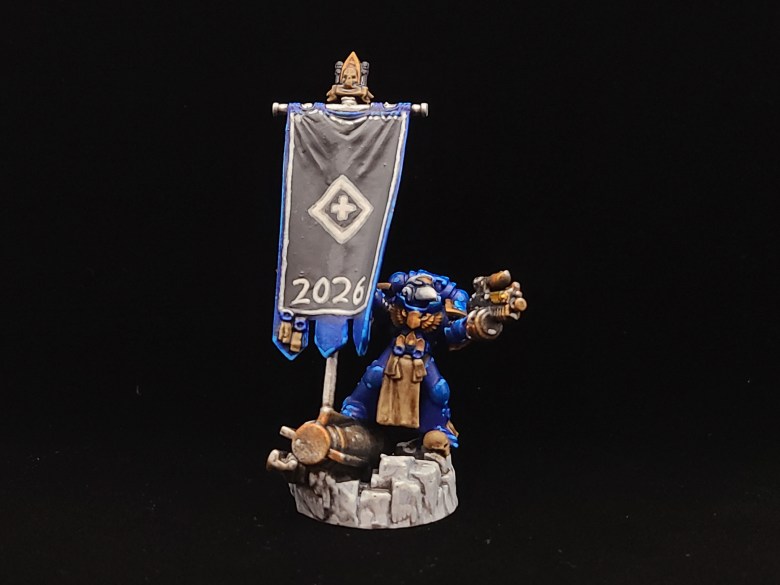
Next, we apply our bone color, either Ushabti Bone or Vallejo’s Buff. We use this to mark off highlights on the skulls, purity seals, and tabards that we want to stand apart. When this is done, we can also blend in a little Screaming Skull or Vallejo Off-White for extreme highlights. Alternating highlights of Agrax Earthshade and Ushabti Bone can also be a good way to build up definition on the fabric and skull portions.
Red:
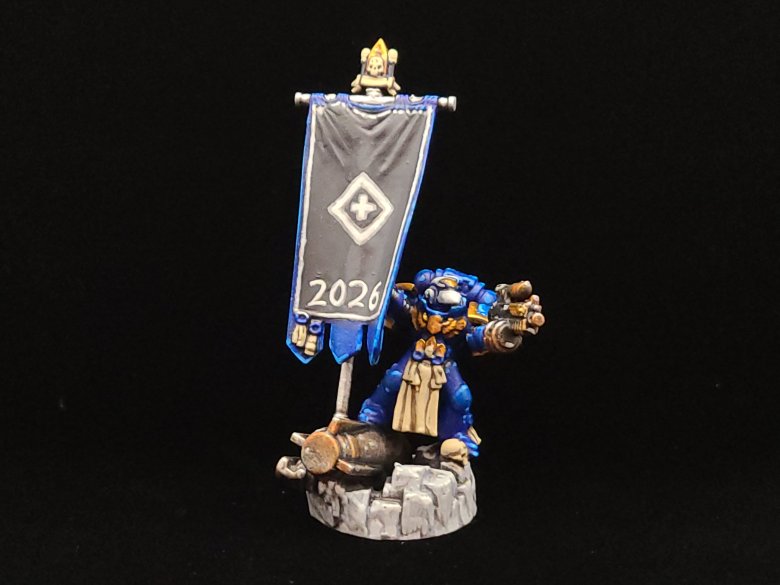
Over our base coat, we’re going to apply either Mephiston Red or Vallejo Carmine Red to the purity seals and to the eyes. On the eyes, again, focus on the side closest to the bridge of the nose, and make this dot a little smaller than the one you made in the last step. Once this is done, you can use Carroburg Crimson or a similar red wash over the wax seals.
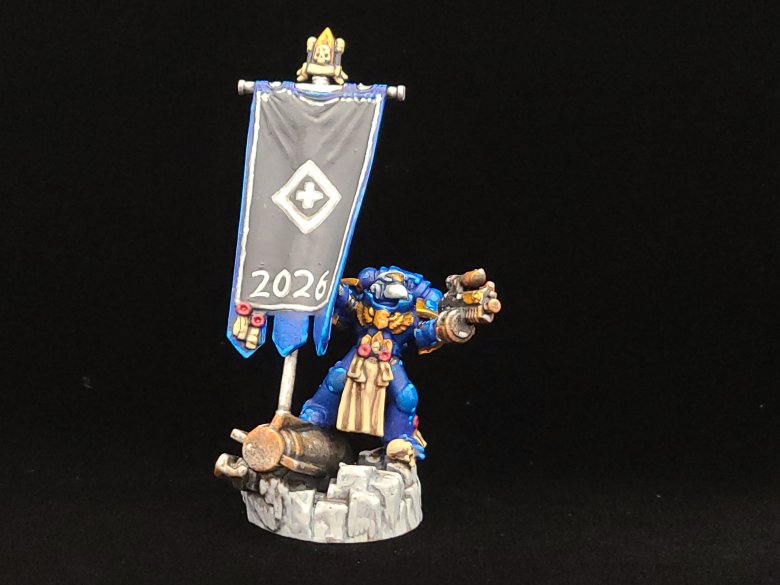
Over our base coat, we’re going to apply either Mephiston Red or Vallejo Carmine Red to the purity seals and to the eyes. On the eyes, again, focus on the side closest to the bridge of the nose, and make this dot a little smaller than the one you made in the last step. Once this is done, you can use Carroburg Crimson or a similar red wash over the wax seals.
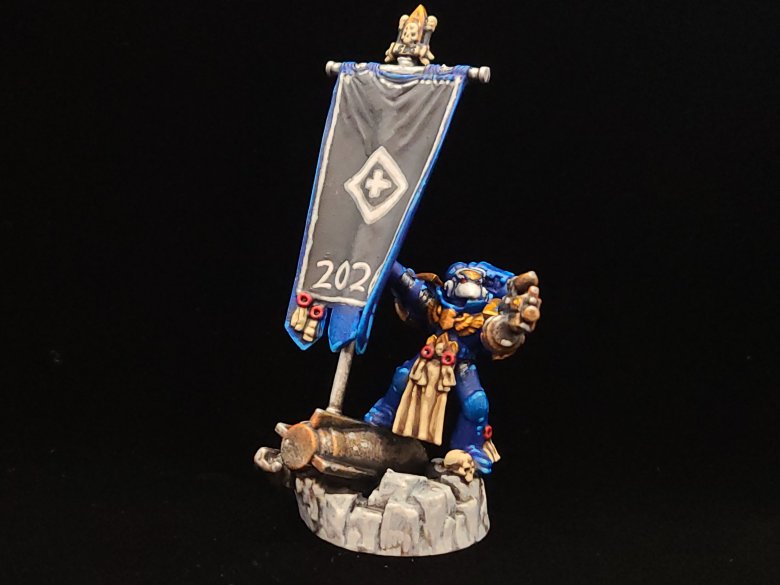
Last, to finish off our miniature we’re going to apply either some Evil Sunz Scarlet or Vallejo Vermilion to the eye in a smaller dot to build the impression of vibrant, slowing eyes. At the opposite end of the lenses, away from the bridge of the nose, we’re going to –put a very, very small white dot to make the impression of a gleaming pair of helmet lenses.
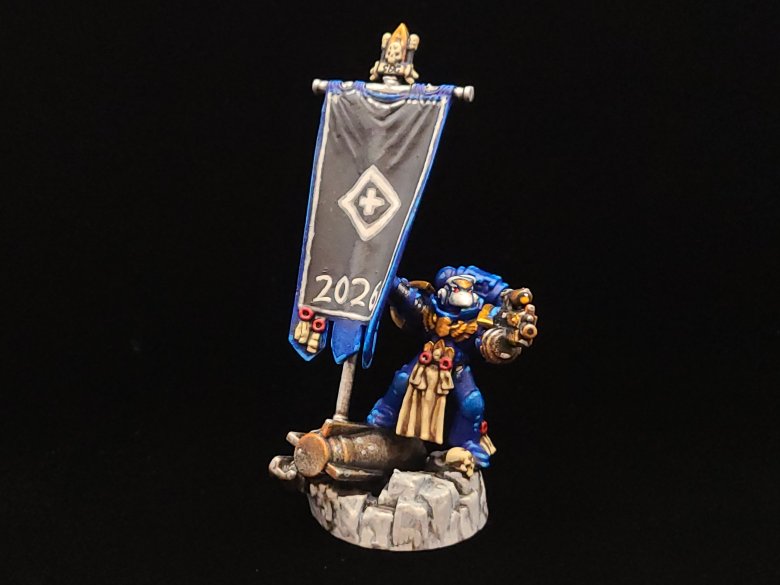
Last, to finish off our miniature we’re going to apply either some Evil Sunz Scarlet or Vallejo Vermilion to the eye in a smaller dot to build the impression of vibrant, slowing eyes. At the opposite end of the lenses, away from the bridge of the nose, we’re going to –put a very, very small white dot to make the impression of a gleaming pair of helmet lenses.
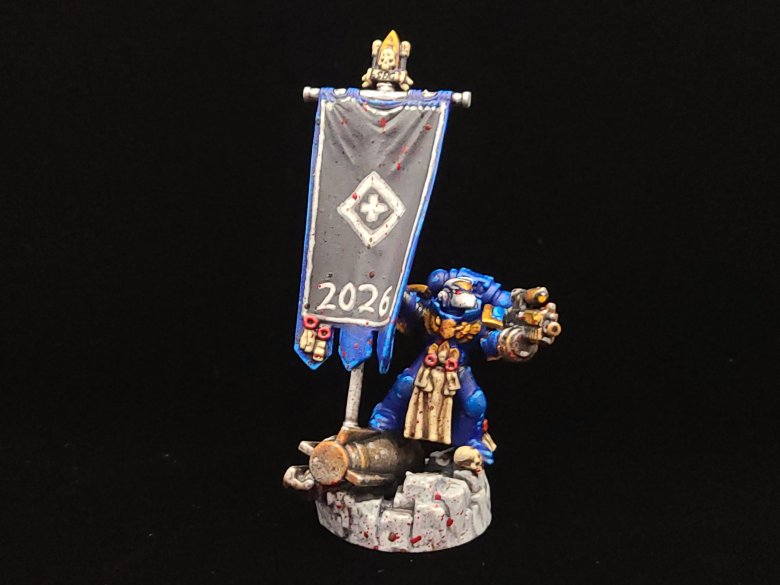
Last, we can use a blood texture or effect paint like Blood for the Blood God or an equivalent to do a quick, dirty blood splatter effect. I loaded a wide brush and flicked the end of it with my fingers to spray flecks of blood along the front of the miniature, the aftermath of all of those live bolter rounds being fired.
And that, step by step, is how I painted a very special little Malum Caedo, and as promised, I have something kind of fun to share. This little Space Marine is about to go on a great big adventure:
Watch me and my friend Brandon play Boltgun at the Sandbox Gaming marathon from June 4 – 7, 2026! The top donor during the Boltgun block on Sunday, June 7 from 3:30pm to 6:30pm (Newfoundland standard time) gets their very own Malum Caedo shipped at no cost to anywhere that the Emperor’s light touches. Proceeds go to benefit local charities including Easter Seals, Big Brothers & Sisters, & the Autism Society of Newfoundland and Labrador.
SBG Streamlabs for donations: https://streamlabs.com/sandboxgamingnl/tip
Link to SandboxGamingNL on Twitch: http://twitch.tv/sandboxgamingnl
Sandbox’s website: https://www.sandboxgaming.org/
I’ve got another tutorial planned where we’ll be painting an adversary for this venerable Ultramarine, and I’ve still got lots of other painting projects planned. Thanks for reading and/or coming along for the ride!
 Twitchy Bristles Painting
Great tutorial Mick, on your GW tax collector (GW staff used to call them that ! LOL), very comprehensive on all the colors for all the parts.
LikeLiked by 1 person
I LOVE that as a nickname, lol. And thanks!
LikeLiked by 1 person