
This is going to be a bit of a diversion from my usual mini-painting endeavours – last year and through the first part of this year, I got it into my head that I needed to be better-equipped for hosting home games of Warhammer 40K and other tabletop or skirmish games. More recently, doing a casual season of 10th edition Warhammer, I realized that I also had some serious gaps in my terrain set-ups – namely, I was missing a lot of verticality and ruins that weren’t just generic L-shapes. I’m setting out this year to do something about that, but terrain has gotten expensive, and so instead of buying more stuff I’m going to try doing it myself, and seeing what I can come up with for nice terrain set pieces on a budget. The best place to start? From the ground up – that is, a terrain table.
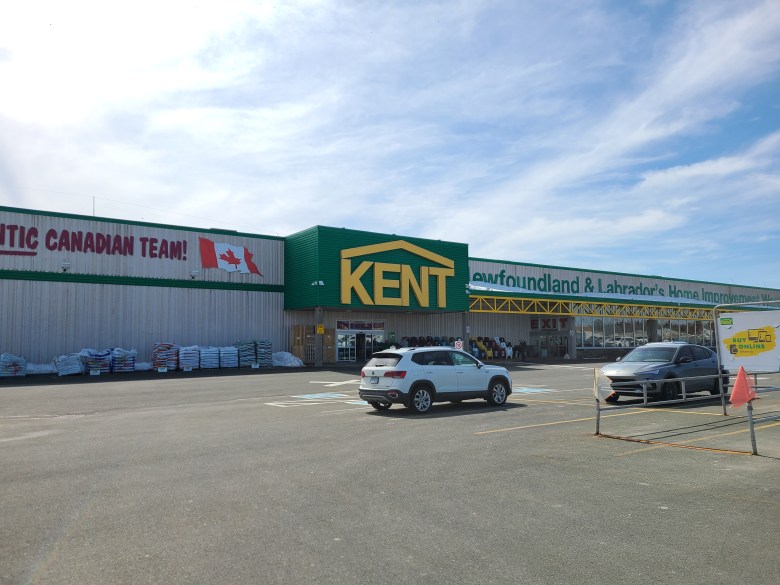
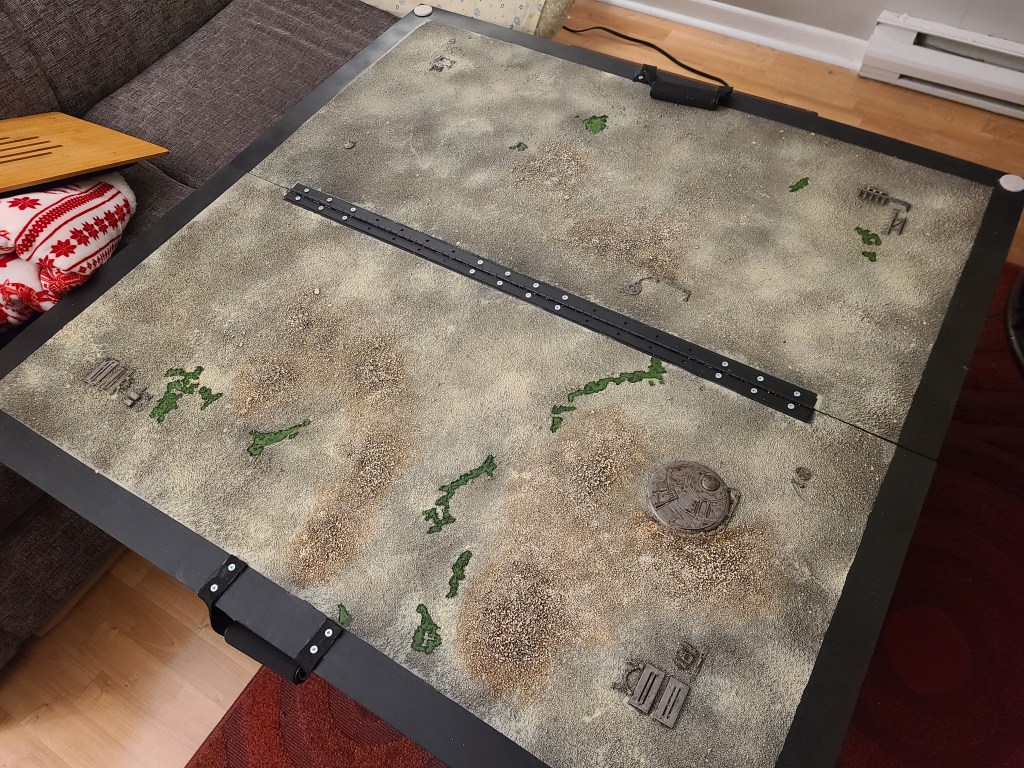
Our story begins last summer at a local hardware store. This idea was an earworm I’d been dragging around with me for a while and, God love him, as soon as I mentioned to my dad that it was on the radar during his trip out to St. John’s he would not let it go. We found ourselves at Kent up on Stavanger Dr., and we picked up a 36″ continuous hinge and a pair of 24 x 48″ boards. To address the elephant in the room, this is not exactly a street-legal 44 x 60″ Warhammer table, and will definitely be a little cramped if you want to play a 2000 point game, but my sweet spot has always been 1000 – 1500 pt. games anyways, and realistically most of the games that I intend to play with this board are just going to be at home with BrittneyStucklessArt anyways!
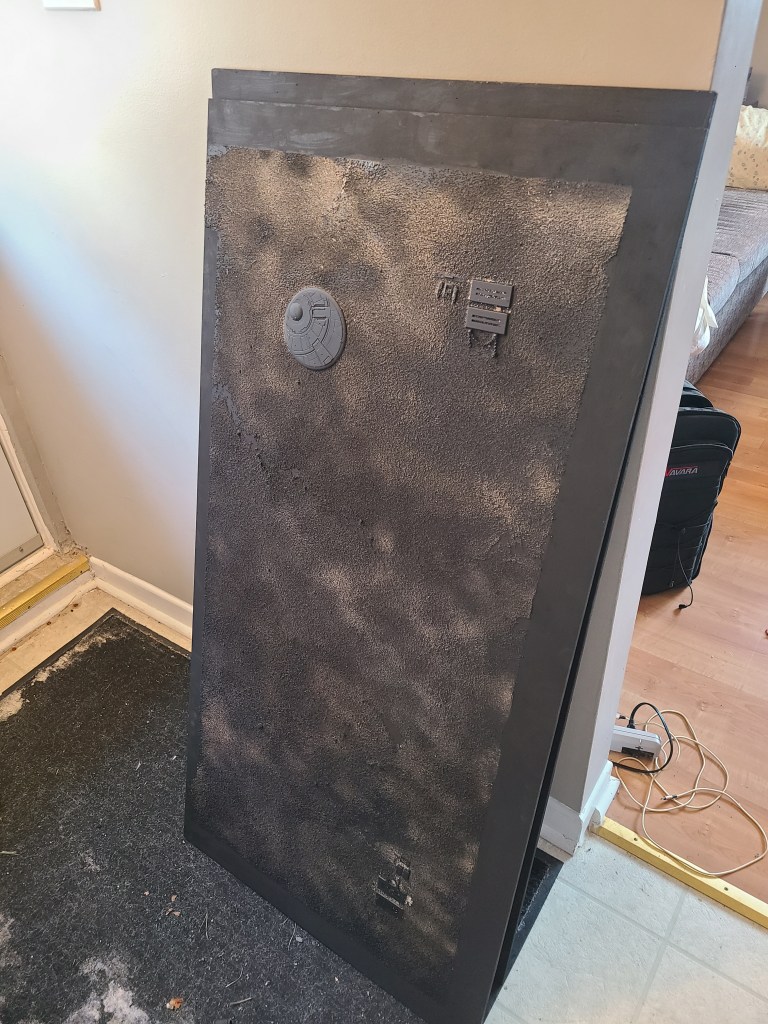
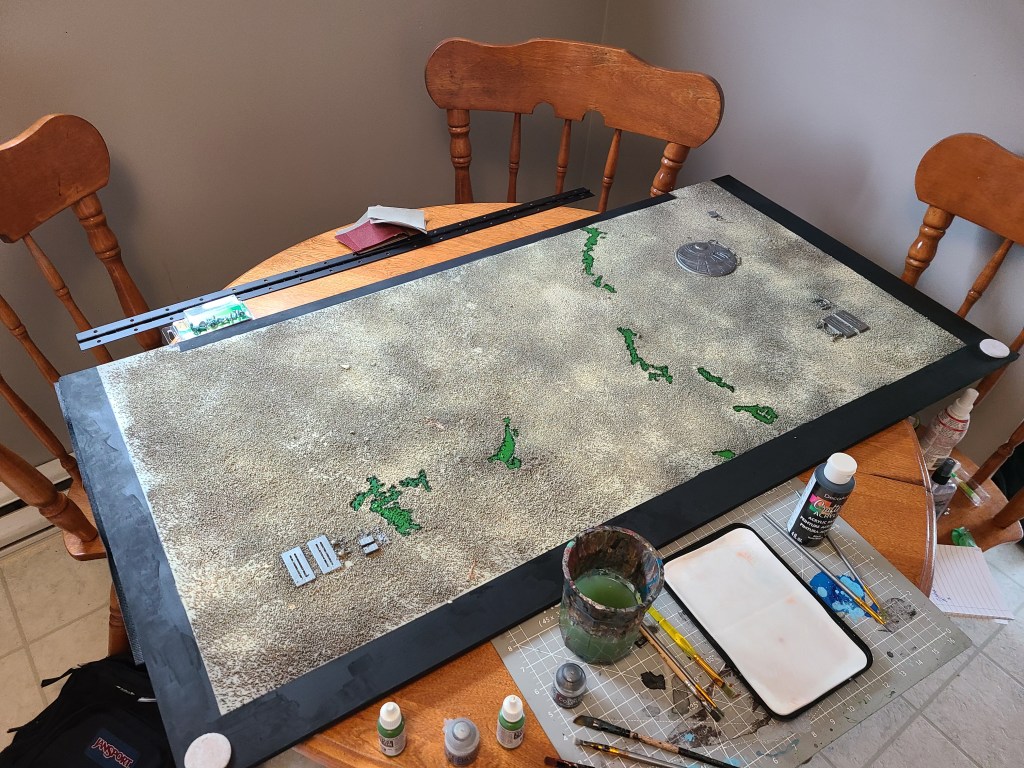
After some preliminary sanding, I primed everything in black, and then masked off the parts of the board that I didn’t want the “terrain” to cover – namely, a two inch border around the table and the sections that the hinge was going to need to grab on to. The hinge unfortunately was going to have to run down the middle, but I’m hoping eventually to run some conduits or other terrain pieces over that to cover it. (In the meantime, it’s kind of a convenient way to mark out board halves.) Once this was done, I added some terrain bits and bobs in the corners at about the six inch mark to make it easier to distinguish a 36 x 36″ layout for smaller skirmish games like Marvel Crisis Protocol.
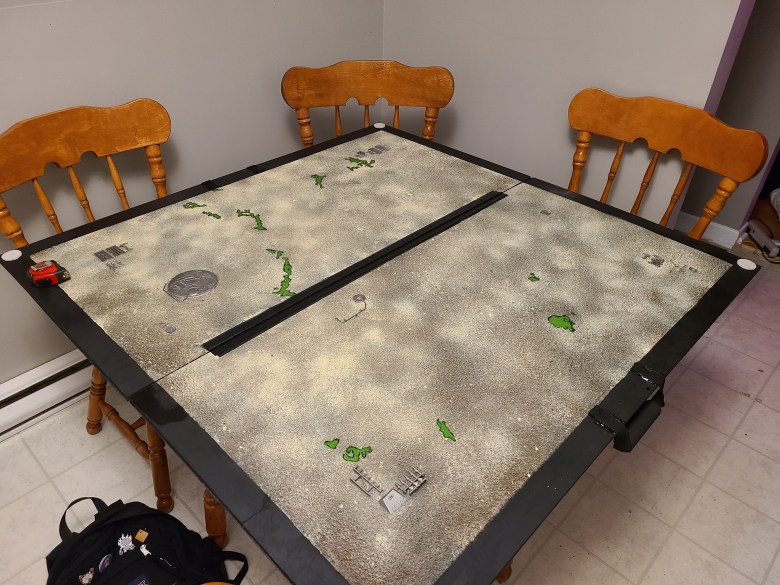
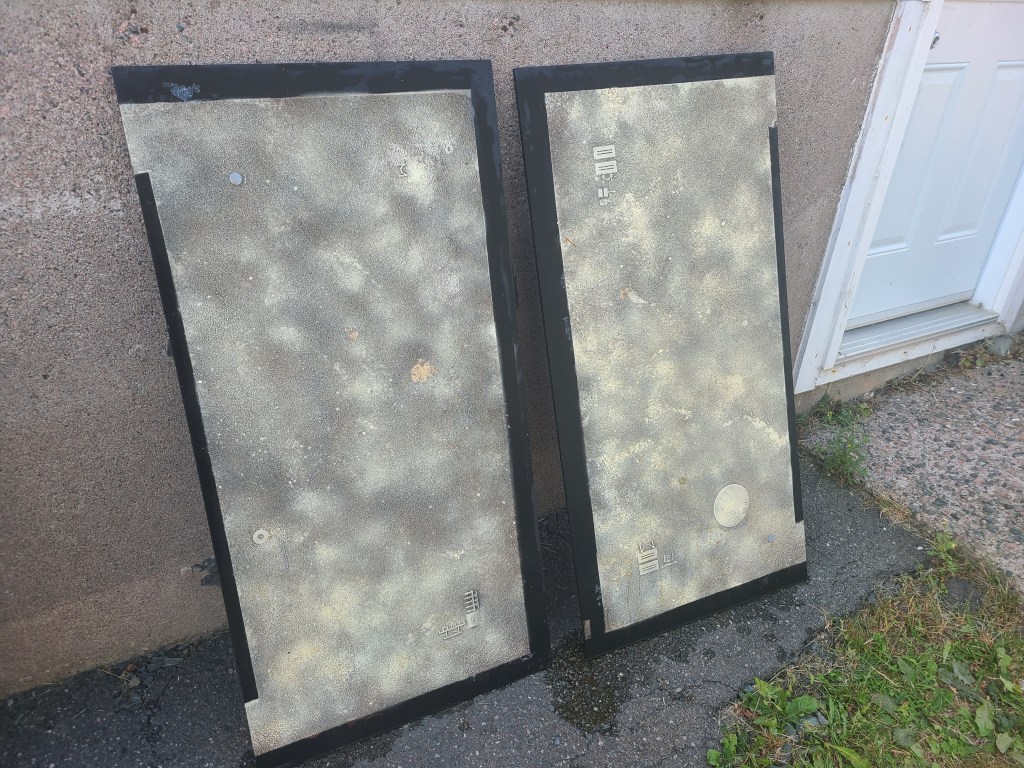
I threw down alternating layers of PVA glue and hobby sand until I was satisfied with the board’s surface. These got a treatment of spray paint from a local dollar store, and where the PVA glue dropped off or didn’t stick well I went in and either did spot fixes, or turned those spots by hand-painting into little toxic pools that would fit some of my other existing terrain pieces and miniature basing. I also put down some mats so that the boards wouldn’t damage the surface of the table, and glued them on with shoe glue because I couldn’t find anything else that would quite grab the mat material effectively.
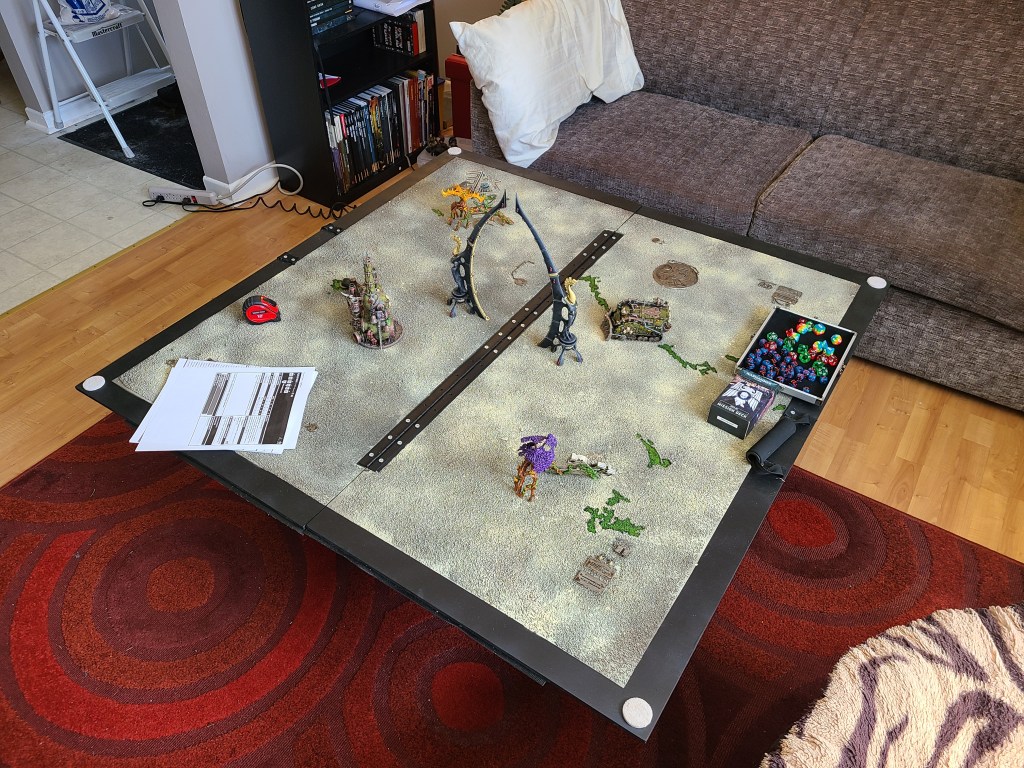
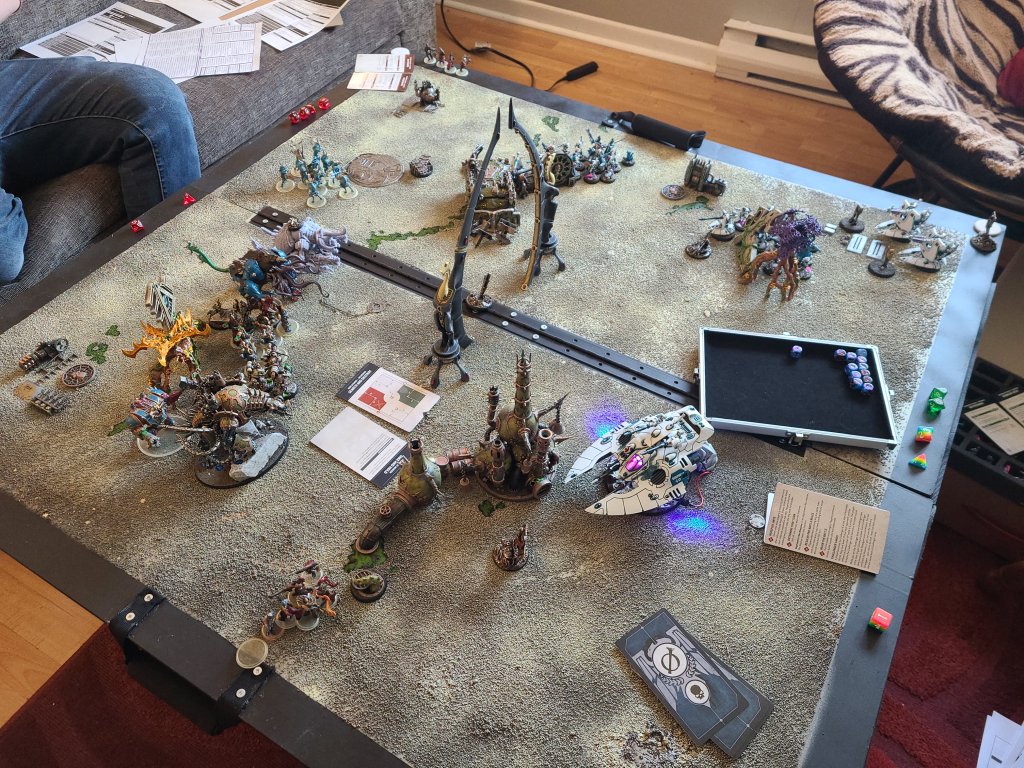
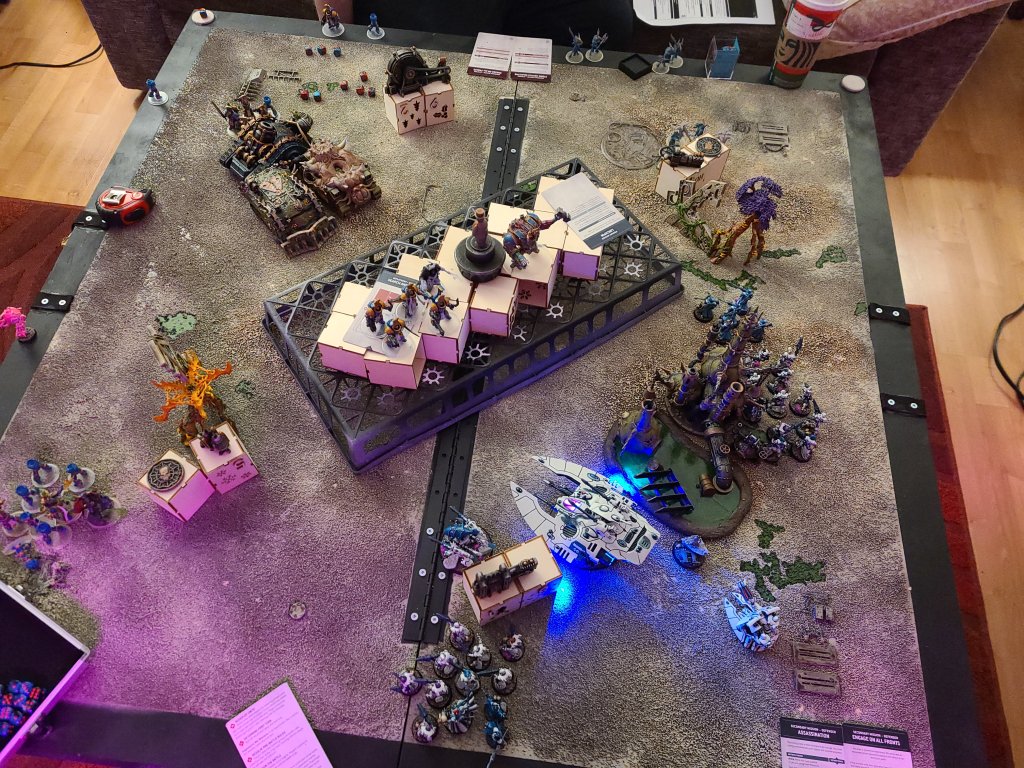
As a finishing touch for transportation and storage, I also added some soft pads up in the corners so that when the board was closed for storage the corners and the terrain greeblies wouldn’t scrape up against each other, and added some handles that I took off of some old dollar store exercise equipment. All in all I’m very satisfied with how this table turned out and it’s already made my Warhammer set-up and take-down for home games a lot more fluid, and a lot more immersive. The total cost of the project was pretty low, and it’s something that makes a big difference, more than doubling the space of my coffee table so that games can be played from the comfort of the couch now.


Great work Mick, and hope you get lots of gaming in on it.
LikeLiked by 1 person
Thanks! It’s had a few games so far and held up well, I’m really happy with how it turned out.
LikeLiked by 1 person