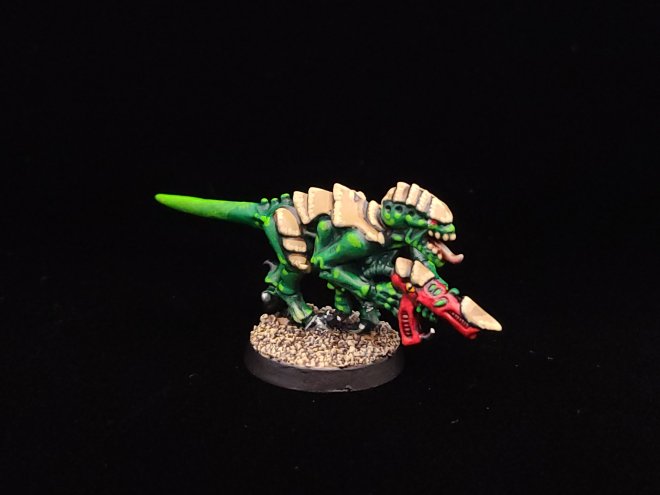
As some of you might know, over the last year at a handful of events I’ve rolled up with all of my paints and done in-person painting walkthroughs with a non-profit I volunteer with, and I’ve also done a few convention panels talking about miniature painting basics, and sometimes I bring example models to both. Every time I come out with Termagants, there’s a question that always comes up, and it is one of my favorite questions:
“Is that a dinosaur with a gun?”
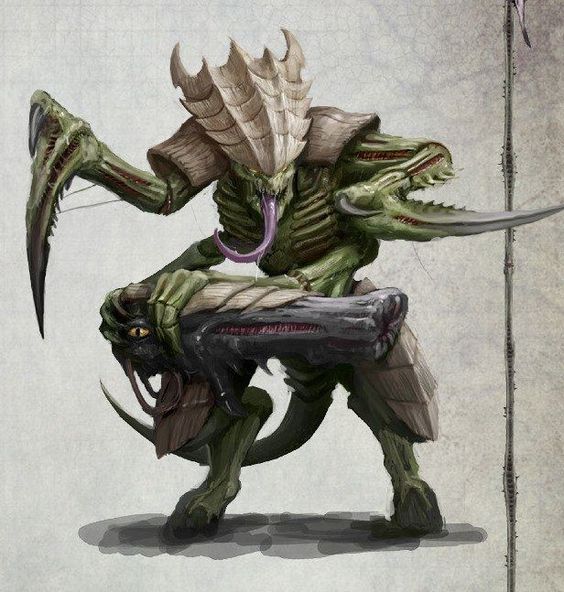
I don’t have the heart to tell them: The Tyranids are an adaptable, gestalt species of aliens that operate in an immensely powerful hive mind composed of a myriad of bioforms tailor-made for specific purposes. They are the galaxy’s greatest apex predators: to them, the rest of the known galaxy is only prey and biomass.
But this is your world, you are the creator, to quote the immortal Bob Ross. And if you want your Termagant to be a dinosaur with a gun, he’s a dinosaur with a gun!
For the rest of us, Hive Fleet Gorgon is an iconic splinter Hive that broke off from Hive Fleet Behemoth after the Battle of Macragge against the Imperium of Man and the Ultramarines chapter of Space Marines. I’ve used their color scheme as one of the sample color schemes on how to paint your very own Tyranids. Alternatively, Games Workshop’s classic Tyranid paint scheme from the 1990’s used alternating red and tan colors, and if you’re not a big fan of green or want to use a smaller palette you can use many of the same colors from this tutorial to paint your Tyranids in a more retro look instead!
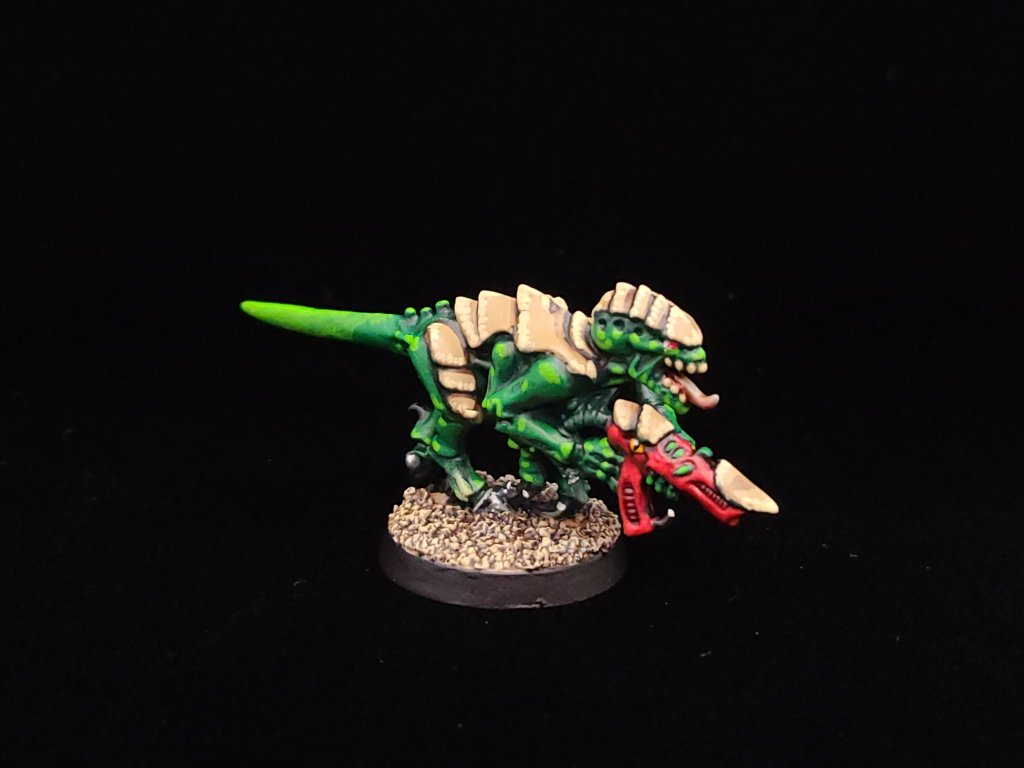
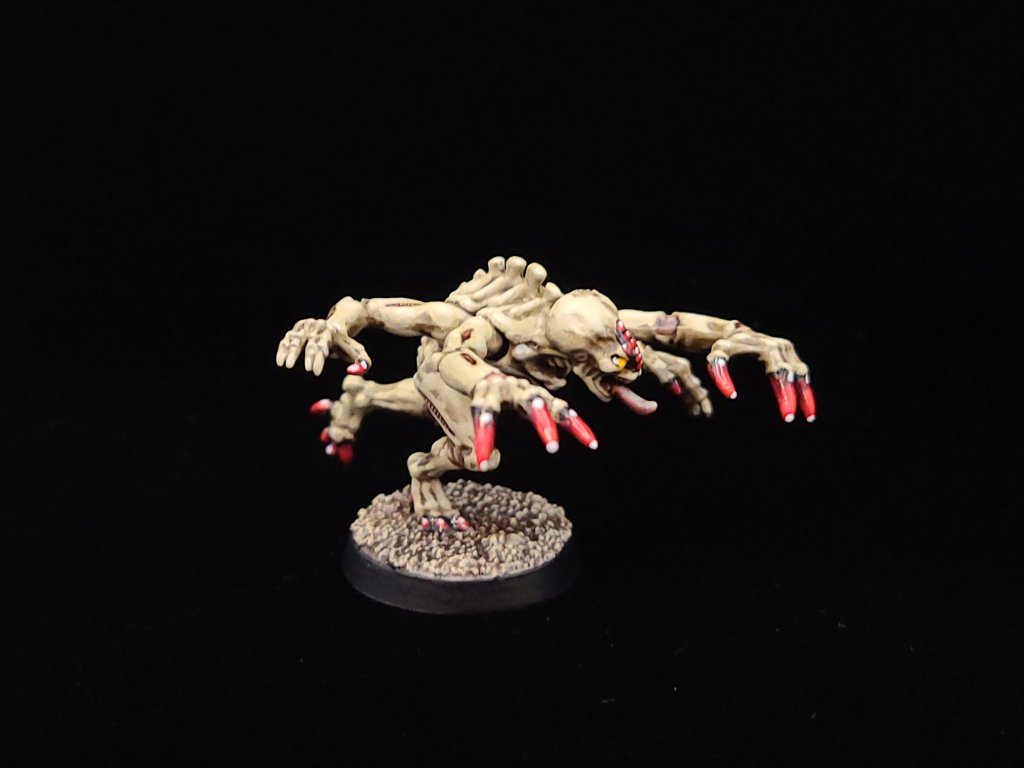
Here, I’ll go over options of paints from two companies – Games Workshop, based in the United Kingdom, and Vallejo, based in Spain. When it comes to washes I’m just going to mention Games Workshops because they’re pretty readily available at retailers and I find especially early on they get great results.
Colors you’ll need:
Black:
•Games Workshop: Abaddon Black
•Vallejo: Black
Green:
•Games Workshop: Caliban Green, Warpstone Glow, Moot Green
•Vallejo: Olive Green, Uniform Green, Lime Green
•Green Washes: Biel-Tan Green, Athonian Camoshade
Brown and Bone:
•Games Workshop: Steel Legion Drab, Zandri Dust, Ushabti Bone, Screaming Skull
•Vallejo: Flat Earth, Gold Brown, Buff, Off-White
•Brown Wash: Agrax Earthshade
Red
•Khorne Red, Mephiston Red, Evil Sunz Scarlet
•Dark Red, Carmine Red, Vermilion
•Red Wash: Carroburg Crimston or Reikland Fleshshade
Flesh:
•Games Workshop: Bugman’s Glow, Rakarth Flesh
•Vallejo: (Have not found a suitable alternative)
•Red Wash: Reikland Fleshshade
Yellow:
•Games Workshop: Averland Sunset, Yriel Yellow
•Vallejo: Gold Brown, Yellow
•Gold Wash: Cassandora Yellow
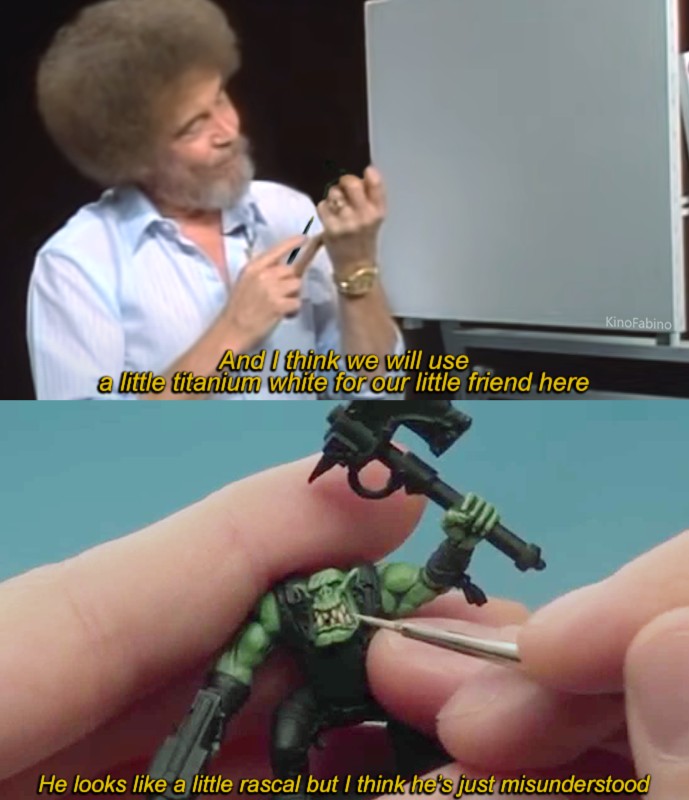
Remember, tutorials like this one are just a guideline! The colors can be anything you want them to be.
It’s your world, you’re the creator, and you can do anything you want on your canvas. Be like Bob!
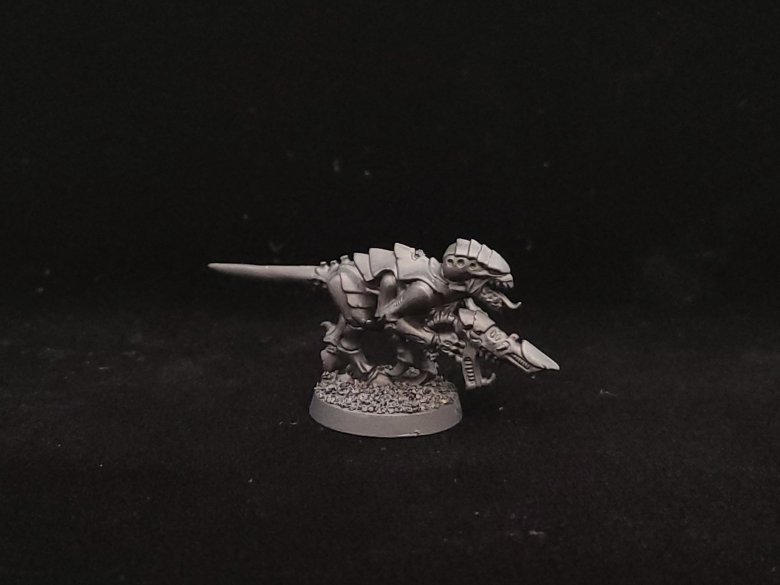
Black/Primer:
When our model is assembled, we’ll attach the model and then glue some basing sand and rocks and other bits over the bases themselves. Try not to get any on the rims, but if you do, it can always be removed with tweezers or sanded off later. When this is done, you can prime your model. For these, I suggest starting with just a flat black primer because were going to build up the black and gray color on most of the model from there.
Green:
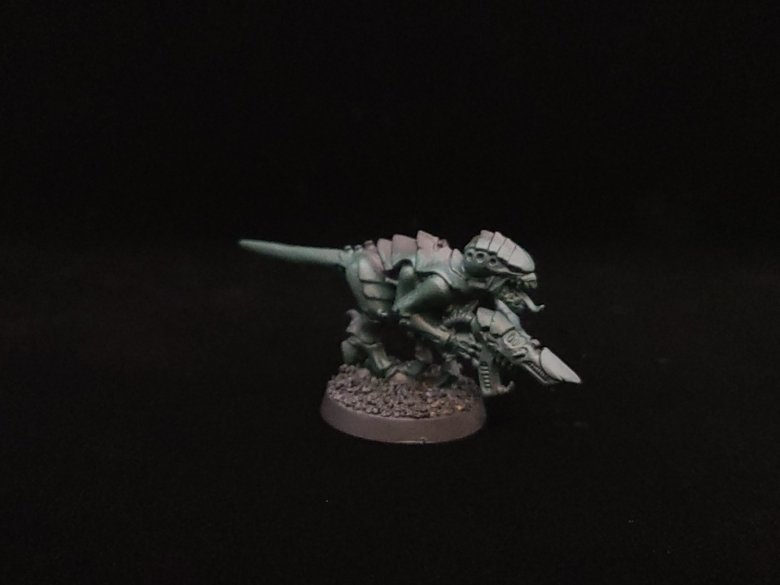
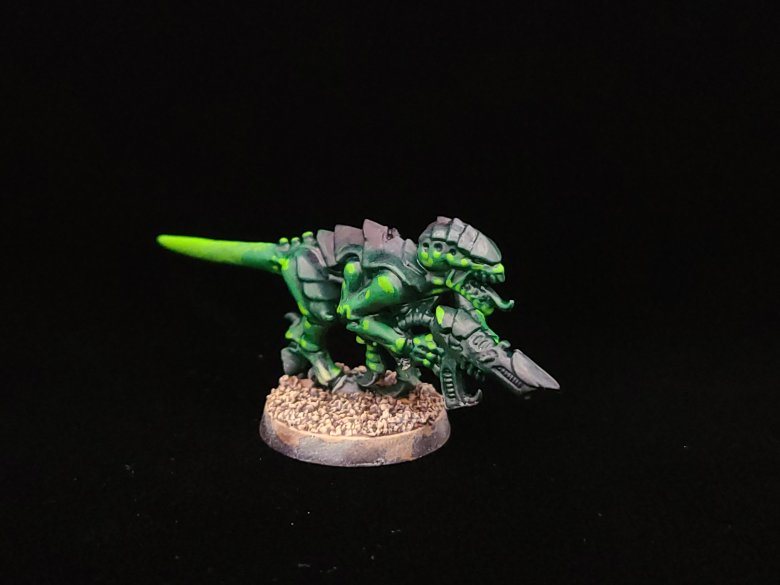
First, we start by base coating our model. Thinning your paint down a little, and using a medium-sized brush, apply either Caliban Green for a nice deep green or Vallejo Olive Green for a more forest green color. Remember that it’s always better to apply a couple of thin coats than a thick coat, to keep the recessed areas clear and to keep from obscuring detail on your model.
Take a larger brush and add some of your Warpstone Glow or Vallejo Uniform Green to it, without watering it down at all. Brush the excess paint off onto a paper towel or your parchment paper until you notice that no more of the wet paint is coming off, or that a lighter amount of pigment is being applied.
Apply your drybrush in back and forth brushing strokes over the model’s surface – this will keep recesses dark and clear but make it appear that the light is reaching areas that stick out more on top. This can help mark out or distinguish what raised details are going to need highlights later. You can also just apply your medium green color with a fine detailed brush over details that should be raised or where you want the light to be hitting.
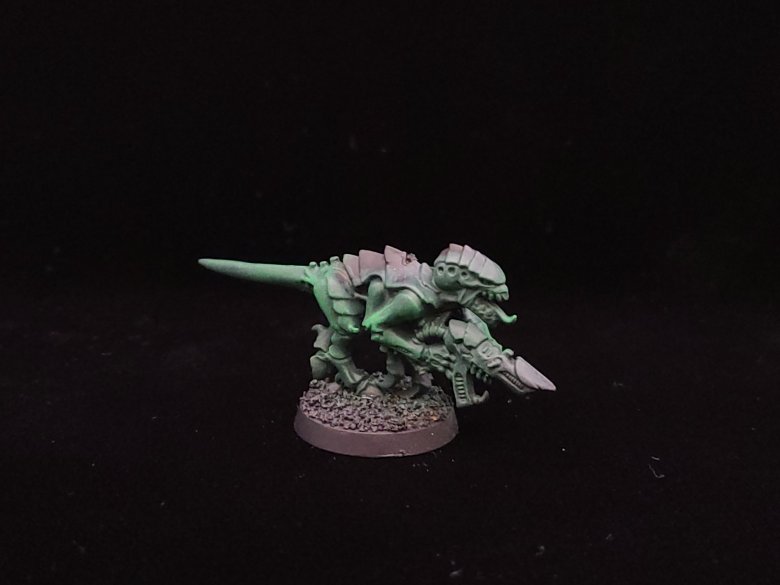
Before you move on to the wash/glaze step of the process, if you want you can take one of your small, detail brushes and apply another coat or two of the medium green you selected in the previous step, highlighting the upper or raised edges that you think that the light source over our miniature would be most drawn to.
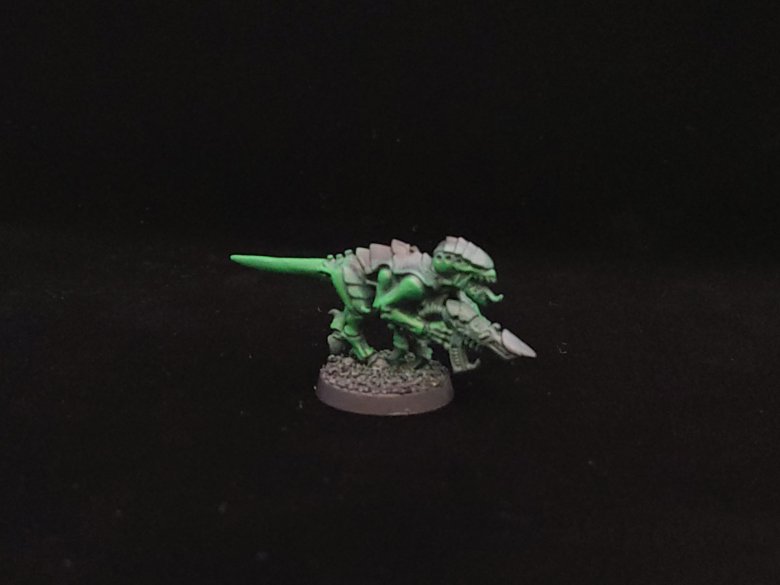
Brush off a little excess after you dip your brush in Biel-Tan Green (for an emerald green) or Athonian Camoshade (for forest tones) because you want to avoid flooding the model you’re working with. A wash can be applied broadly and will sink into the recessed details and darken them from the color of your base coat and add more depth to the model.
Look out for excess wash paint collecting in little pools or blobs – you can either push or pull it around with your brush to areas with less coverage while wet or use a paper towel or sponge to soak up any excess.
If you drybrushed before, you can apply a light drybrush coat again after this stage or you can apply a little of your medium green with a detail brush to clean up if you think the wash might have darkened things up too much.
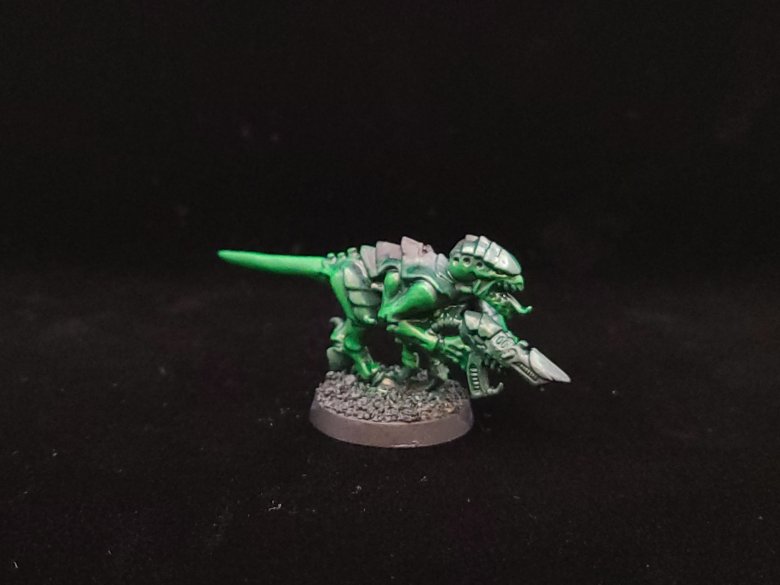
This step will look especially good if you did the optional highlights earlier, but now that we have applied our wash or our glaze, we can take a small detail brush and again, just apply a little of a light green color where we think the light would touch, at the most raised edges of the model. This can be Citadel Moot Green, or Vallejo Lime Green depending on the colors you selected earlier. The result should be a nice gradient that goes from a dark green in the recesses and undersides to a nice crisp, light green.
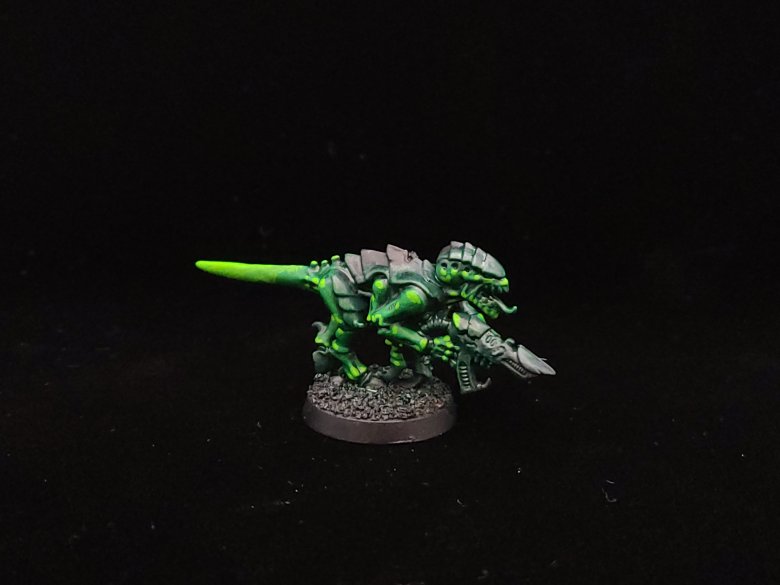
Brown & Bone (Basing) :
A good rule of thumb is to paint colors in order of what covers the most surface area. There’s lots of exceptions to this, but here we’re going to paint our brown with two thin coats of either Steel Legion Drab or Vallejo Flat Earth on the base to represent the ground our dinosaur with a gun is standing on.
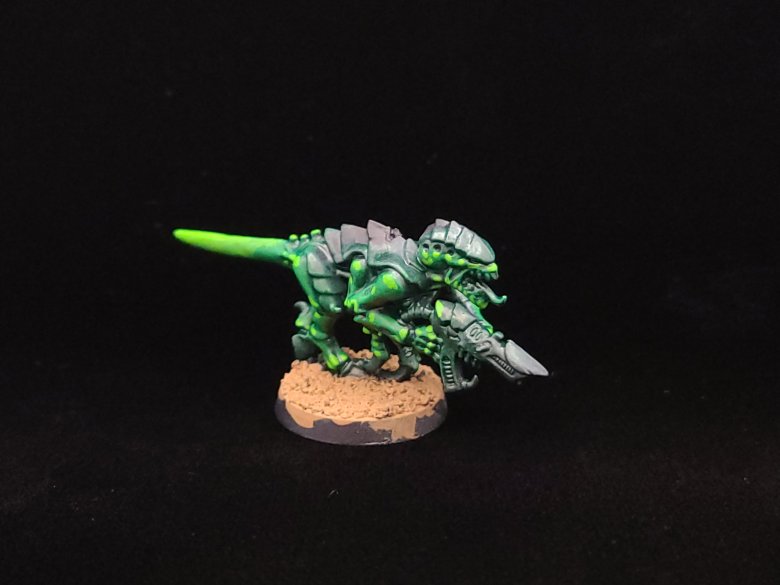
With our base coat applied, we’re going to apply a wash of Agrax Earthshade to get down into the recesses and give our basing more definition.
Once the wash is dried, apply a light drybrush of Flat Earth or Steel Legion Drab to your base to add more contrast – this will help a lot with the next step.
To finish our basing we’re actually going to skip ahead and apply our Bone color, either Ushabti Bone or Vallejo’s Buff. We’re going to apply this by drybrush only to the basing, and it will work as a highlight on the ground. You can alternate lighter or watered-down washes and lighter drybrushes for a little more contrast, too.
Red:
In two thin coats, we’re going to now very carefully apply Khorne Red or Vallejo Dark Red to the fleshy parts of the gun, careful to avoid the dinosaur’s little fingers, and the chitin over the back and forward sections of the gun.
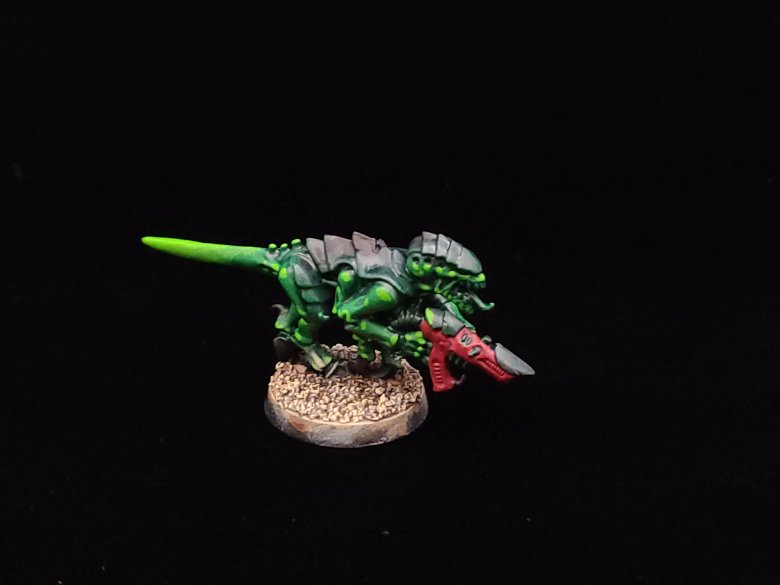
Once our dark red has dried, we’re going to apply a medium red color, either Mephiston Red, or Vallejo’s Carmine Red, to raised surfaces of the gun to start building up a little color definition.
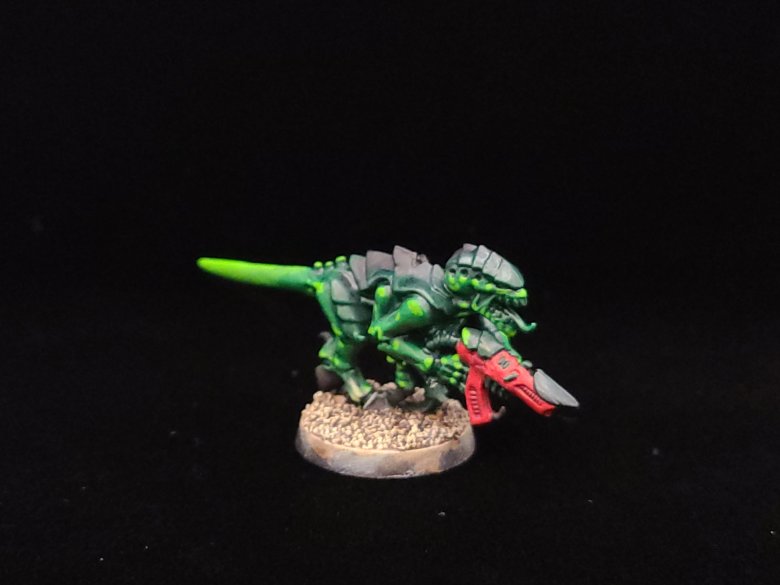
Carefully, we’re going to apply Carroburg Crimson as a wash to the gun to fill in those recessed areas and make them a little darker – try again to avoid the fingers but you can always clean these up later if you catch them by accident. Once your wash is dry, you can use your medium red to raise up some highlights again, and you can even blend in a little Vermilion or Evil Sunz Scarlet for more extreme highlights if desired.
Brown & Bone (Chitin) :
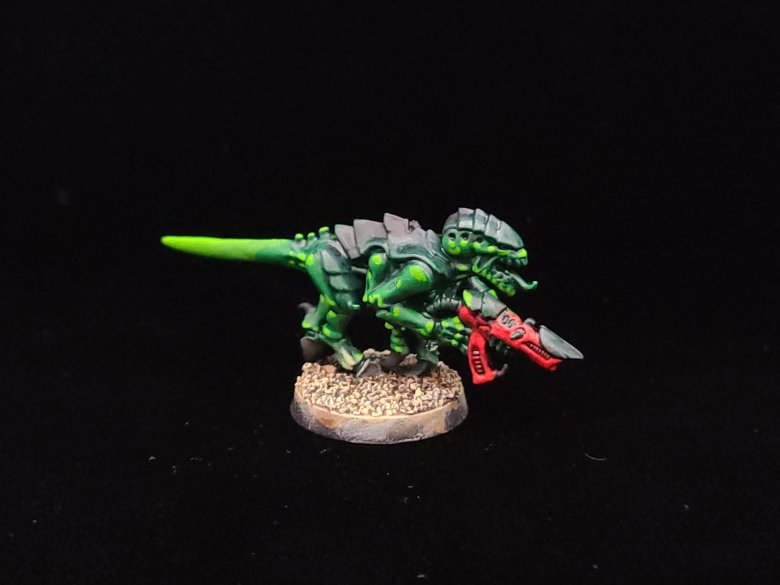
We’re going to go back and start base coating the chitin areas, which we’re going to try and paint in a nice crisp bone color to contrast against the darker green flesh tones. Apply two thin coats of Zandri Dust or Vallejo Gold Brown to all of your chitin areas, leaving a little gap between each plate – our washes and highlights will help make these look right.
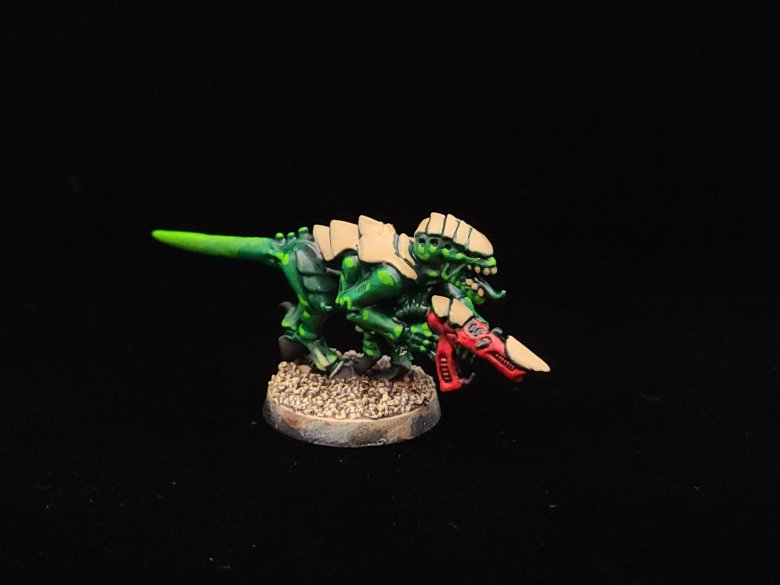
Carefully we’re going to apply a wash of Agrax Earthshade to our chitin, and once it dries we’re going to sue our base color again to raised parts to resume building a bit of a gradient. We’re going to take this a step further by adding Ushabti Bone or Vallejo Buff in jagged, almost zig-zag highlights on the raised edges to make the chitin look chipped or feathered.
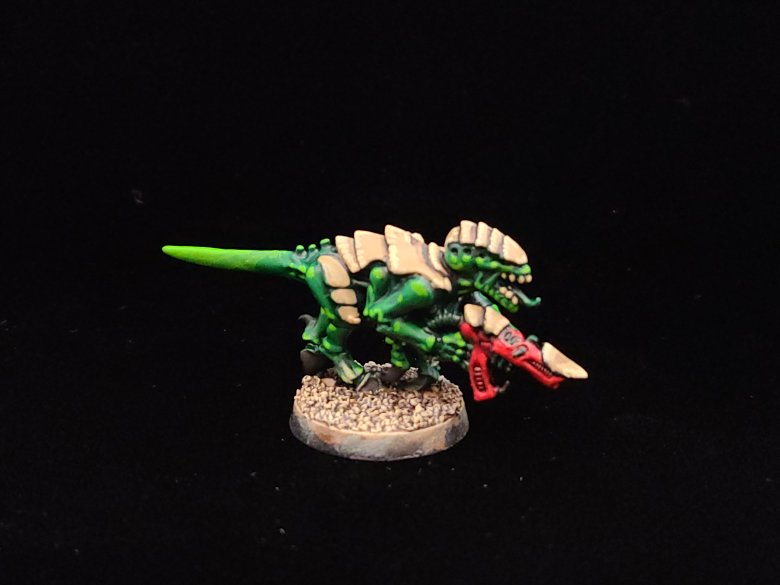
Next verse, same as the first! We’re going to apply some Agrax again, after lightening it with some Contrast Medium or Acrylic Matte Medium to the chitin to build a little more definition, and then we’re going to reapply that chipped, feathered light bone color we used before. Last, we’ll either blend in some Screaming Skull to our Ushabti Bone, or some Off White to our Buff, and we’ll use this to paint the most extreme raised parts of the chitin.
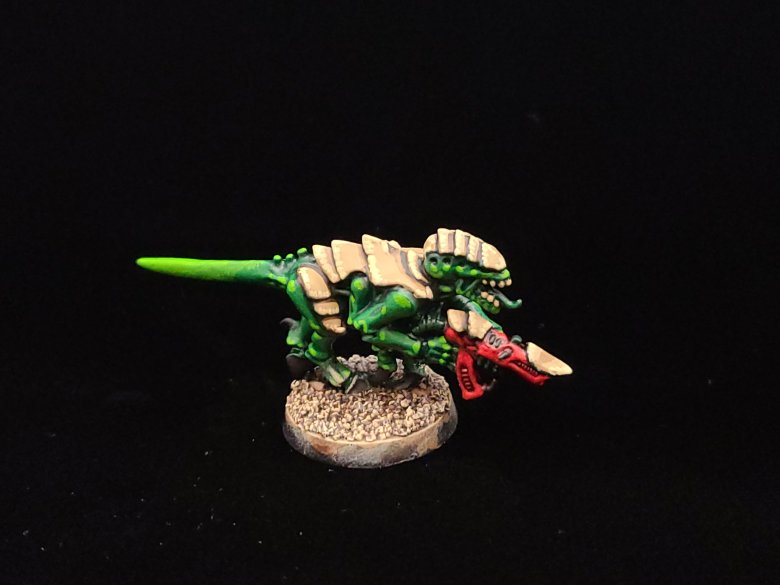
With most of our model done, we’re going to clean up the fingers, and then we’re using Bugman’s Glow for the tongue and any other fleshy details we want to emphasize, and we’re going to paint black dots where the eyes on the head and the gun should go (the gun has eyes, Tyranid guns are Tyranids too!), and we’ll use our dark red color for the eyes on the head and either some Averland Sunset or Gold Brown for the gun-eye.
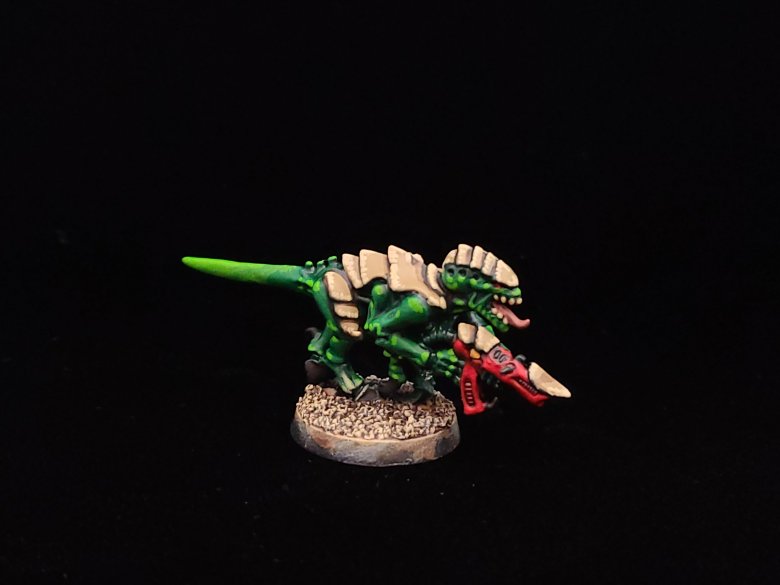
Over our Bugman’s Glow tongue, we’re going to apply some Rakarth Flesh, and we’re going to apply our medium red tone to the eyes on our dinosaur. On the gun, we’re going to accept the eye with some Yriel Yellow or Yellow, and then we’re going to apply a little wash to the tongue of Reikland Fleshshade, and a wash to the gun-eye of Cassandora Yellow. Lightly – little goes a long way.
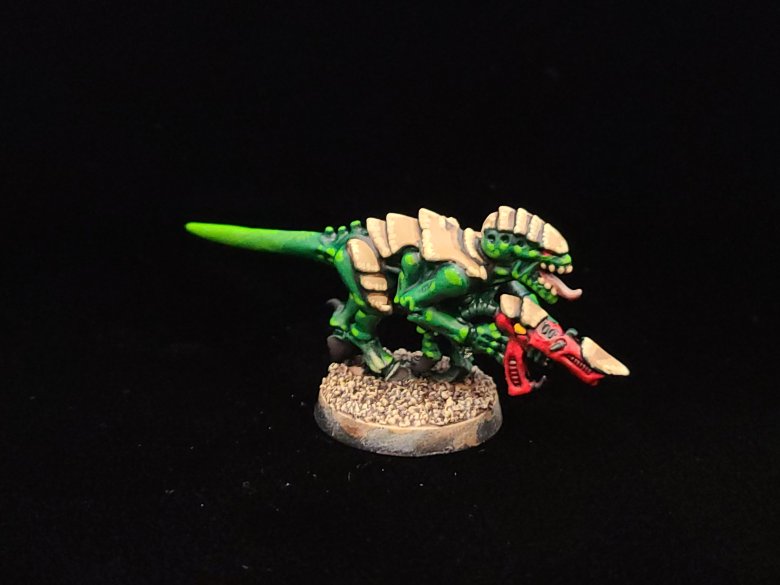
Highlight the raised part and end of the tongue with Rakarth Flesh, and we can call that done. Apply some Evil Sunz Scarlet or Vermilion Red to the eye of the dinosaur, and some Yriel Yellow or Yellow to the eye on the gun again, and then make a little slit-shaped eye with black on the larger gun-eye.
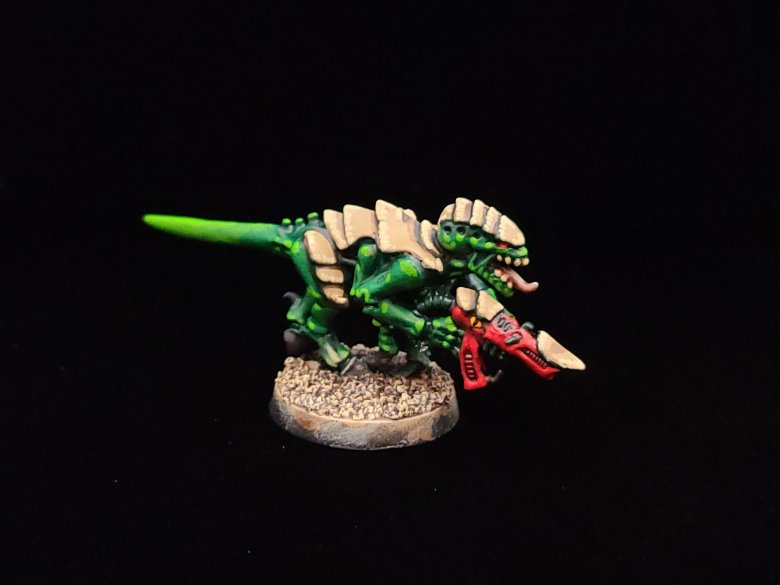
The last thing we’re going to do, after sealing off our base in Abaddon Black or Vallejo Black, is we’re going to use either White Scar or Vallejo White to put a teeny tiny white dot on both eyes where we feel like the light source would be striking them. This helps build the illusion that there is a liquid layer over our eye, or that the eyes are a more reflective surface. It also helps draw the eye to these points since the brightness helps them stand out. It also works wonders on claws, along with little dots of dark green or gray underneath.
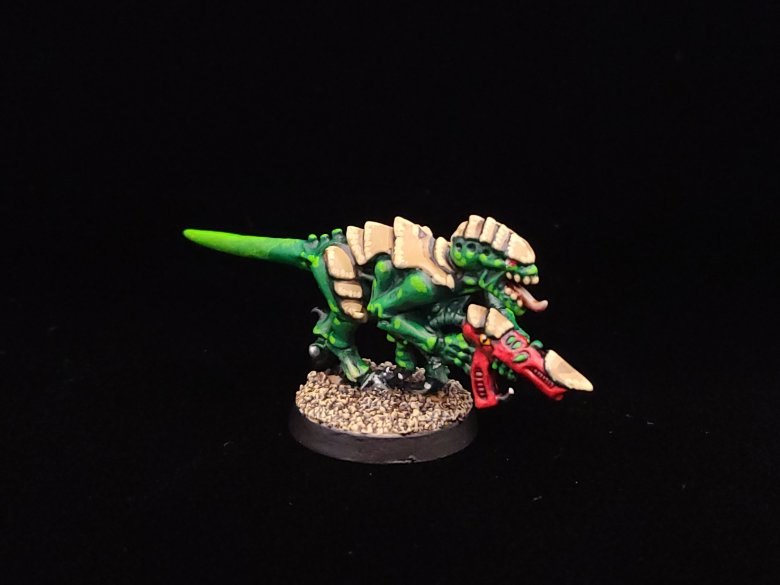
And that’s how I paint “dinosaurs with guns!” This, along with my earlier Ultramarine tutorial, and the other two that I posted last year are kind of the bread-and-butter of my in-person workshops right now and I’m happy with a nice variety that makes use of plenty of overlapping palette colors. I don’t know if I’ll do too many more of these, but it does my soul good to know that a Tyranid one is up now, with how popular the dinosaurs with guns have been.


Great tutorial Mick, and one of the less used Nid schemes.
LikeLiked by 1 person
Thanks! Yeah, I think Gorgon could use some love. And I think green is just such a cool color for ‘Nids.
LikeLiked by 1 person